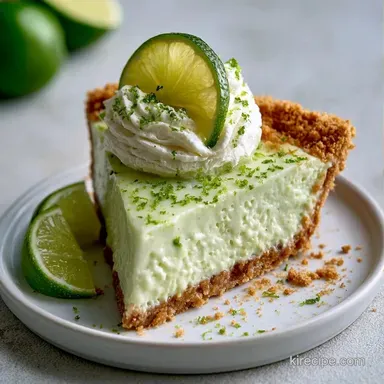
Key Lime Yogurt Pie with Greek Yogurt
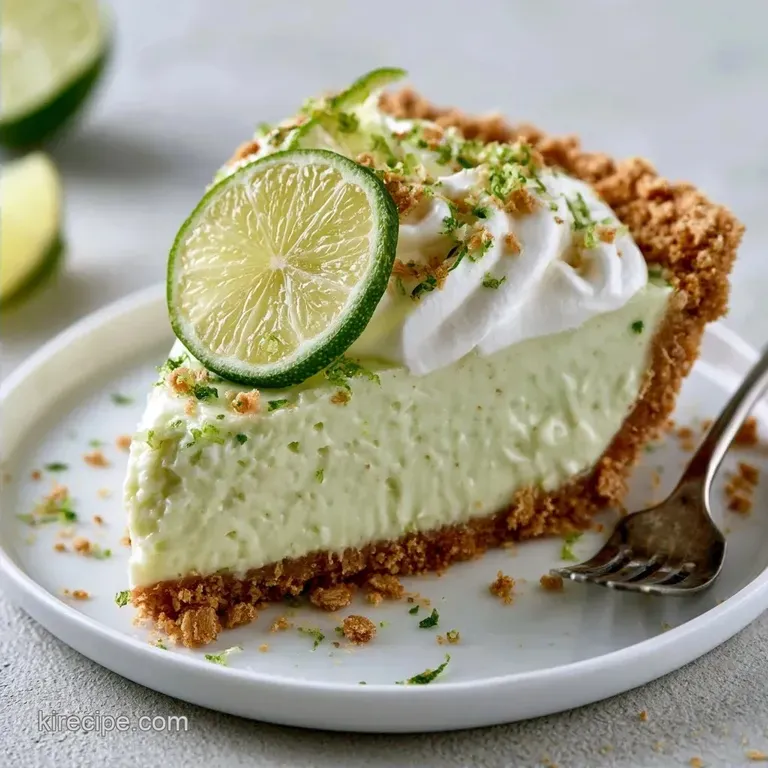
- Time: 15 min active + 4 hours 15 mins chilling
- Flavor/Texture Hook: Zesty, silky filling with a buttery, sandy crust
- Perfect for: Summer potlucks, beginner bakers, or light dessert cravings
The sharp, citrusy scent of sliced limes always takes me back to a humid afternoon in Florida. I remember trying to make a traditional pie for a family get together, but it felt way too heavy. I wanted something that tasted like a vacation but didn't leave me feeling like I needed a nap immediately after one slice.
That's where this version comes in. By swapping some of the heavy fats for Greek yogurt, you get a brightness that cuts through the sweetness of the condensed milk. It's a win because you skip the oven entirely, which is a huge relief when it's 90 degrees outside.
You can expect a dessert that holds its shape when sliced but melts quickly on the tongue. This Key Lime Yogurt Pie balances that distinct "zing" with a creamy base, making it a great choice for anyone who finds standard lime pies a bit too cloying.
Easy Key Lime Yogurt Pie Recipe
Let's go over the essential details. Since this recipe requires no baking, your primary "cooking" method is simply allowing the fridge to do the heavy lifting.
Precision is key. Rushing the chilling stage means the filling won't bond correctly, leaving you with a limey soup instead of a sliceable dessert. Trust me, those 4 hours are absolutely mandatory.
For the best outcome, keep these three checkpoints in mind: 1. The crust needs exactly 10 minutes in the freezer to firm up the butter. 2. The filling must be a pale ivory color before you stir in the lime juice. 3. The final set takes a minimum of 4 hours at 40°F (4°C).
The Logic Behind the Set
Most people think you need gelatin or eggs to make a pie firm. In this case, the citric acid in the Key lime juice denatures the proteins in the Greek yogurt and condensed milk, causing them to tighten and thicken.
Protein Stability: Greek yogurt provides a denser protein structure than sour cream, which helps the pie maintain a clean edge when sliced.
| Method | Time | Texture | Best For |
|---|---|---|---|
| Yogurt Base | 15 min prep | Light & Tangy | Fresh, summer vibes |
| Egg Base | 60 min prep | Dense & Custardy | Traditional holidays |
This contrast is why the yogurt version feels more refreshing. It doesn't have that "heavy" aftertaste that comes with baked custards.
What You'll Need
I prefer using full fat Greek yogurt because the fat carries the lime flavor better. If you use 0% fat, the texture can get a bit grainy.
| Ingredient | What It Does | Best Swap |
|---|---|---|
| Graham Cracker Crumbs | Provides a buttery, crisp base | Digestive biscuits |
| Sweetened Condensed Milk | Adds sweetness and thickness | Evaporated milk + sugar |
| Greek Yogurt (Full Fat) | Adds tang and structural protein | Sour cream (will be heavier) |
| Key Lime Juice | Triggers the thickening reaction | Standard Persian lime juice |
The Full List: 1.5 cups (150g) graham cracker crumbs Why this? Standard sweetness and a sandy texture. 0.25 cup (55g) granulated sugar 6 tbsp (85g) unsalted butter, melted 1 can (14 oz / 397g) sweetened condensed milk 1 cup (245g) plain Greek yogurt, full fat
Why this? Essential for the protein based set. 0.5 cup (120ml) fresh Key lime juice Why this? The acid is what thickens the filling. 2 tbsp (6g) Key lime zest 1 tsp (5ml) vanilla extract
| Original Ingredient | Substitute | Why It Works |
|---|---|---|
| Graham Crumbs | Almond Flour | GF option. Note: Needs more butter to bind |
| Key Lime Juice | Lemon Juice | Similar acidity. Note: Changes flavor profile to lemon pie |
| Greek Yogurt | Labneh | Even thicker set. Note: Much saltier, reduce added sugar |
Essential Tools for Success
While any kitchen will do, these specific items will make your preparation much easier.
- 9 inch pie plate (glass or ceramic is ideal)
- Medium mixing bowl (for the crust)
- Large mixing bowl (for the filling)
- Hand mixer or whisk
- Offset spatula (for a perfectly flat, polished top)
- Zester or fine grater
Tip: A large spoon can easily replace an offset spatula. Simply use it to press the filling into the edges to ensure there are no air gaps.
The step-by-step Process
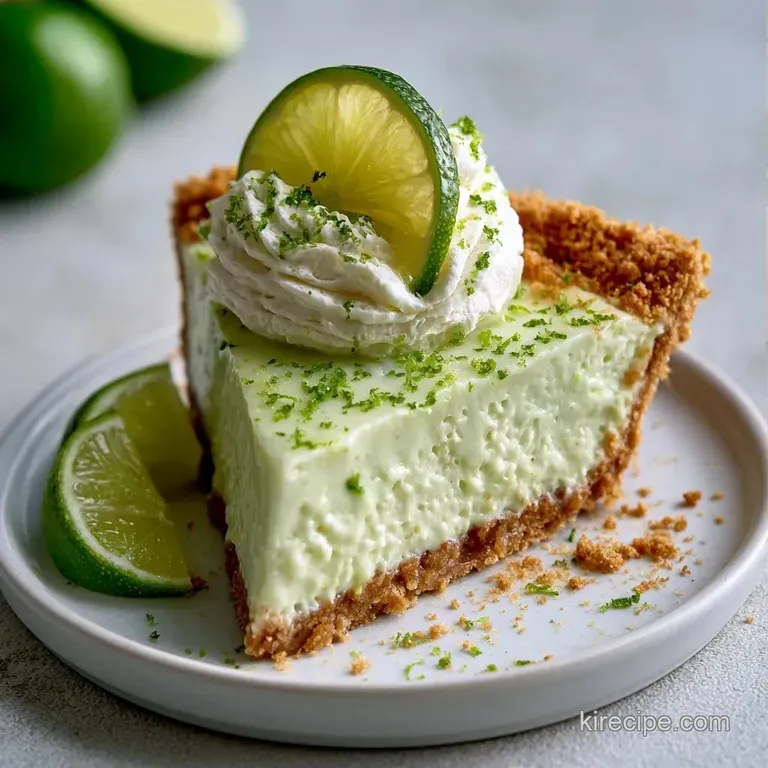
Phase 1: Preparing the Crust
- In a medium bowl, stir together the graham cracker crumbs and sugar.
- Mix in the melted butter until the texture resembles wet sand.
- Press the crumb mixture firmly into the bottom and up the sides of a 9 inch pie plate.
- Chill the crust in the freezer for 10 minutes Note: this keeps the base from shifting into the filling.
Phase 2: Mixing the Filling
- In a large bowl, beat the Greek yogurt and sweetened condensed milk until smooth and ivory in color.
- Gradually whisk in the Key lime juice until the mixture thickens and forms a soft peak.
- Gently fold in the vanilla extract and lime zest until well combined.
Phase 3: Chilling and Setting
- Spread the filling into the cold crust, smoothing the surface with an offset spatula.
- Cover the top loosely with plastic wrap.
- Refrigerate for at least 4 hours, or overnight until the center is firm and doesn't jiggle.
What Nobody Tells You
Most people assume any lime will do, but Key limes are smaller and more acidic. This higher acidity is actually what makes the Key Lime Yogurt Pie set so firmly. If you use regular supermarket limes, you might find the filling is slightly softer.
Another point people miss is the temperature of the yogurt. If the yogurt is ice cold from the fridge, it can sometimes cause the condensed milk to seize or clump. I usually let the yogurt sit out for 10 minutes so it's slightly tempered.
For those who love a fruit forward dessert, this pairs well with a Classic Peach Crisp for a summer dessert spread.
Pro Tips and Pitfalls
Fixing Runny Filling
This usually happens if you used low-fat yogurt or didn't use enough lime juice. If the pie is still too soft after 4 hours, put it back in the fridge for another 2 hours. Avoid the temptation to put it in the freezer, as that can break the emulsion and make the texture grainy.
Saving a Crumbling Crust
If your crust cracks when you slice, it means the crumbs weren't pressed firmly enough or you skipped the freezer step. You can't fix the crust once the filling is in, but you can hide the cracks with extra whipped cream or lime zest on top.
Balancing Too Much Tartness
If the lime juice was particularly potent and the pie tastes too sharp, serve it with a dollop of sweetened whipped cream. The fat in the cream neutralizes the acid on your palate, bringing the flavors back into balance.
Managing Air Bubbles
Whisking too vigorously can introduce air, leaving tiny holes in your slices. Use a folding motion for the final zest and vanilla to keep the filling dense.
Keeping the Pie Fresh
The pie remains fresh for 3 days when refrigerated. To keep the crust from absorbing odors from other foods, keep it sealed with a cake dome or plastic wrap.
For longer storage, you can freeze the pie for up to 2 months. I suggest freezing just the crust and making the filling fresh. If you freeze the complete pie, let it thaw in the refrigerator for 6 hours before serving.
To reduce waste, transform the remaining lime rinds into a quick citrus syrup for cocktails or tea. Just simmer the rinds with equal parts sugar and water for 10 minutes.
Dietary Swaps and Tweaks
For a Healthy Key Lime Yogurt Pie, you can replace the sweetened condensed milk with a mixture of evaporated milk and a natural sweetener like monk fruit or stevia. Note that this will change the thickness, so you might need to add a teaspoon of agar agar.
If you want a Greek Yogurt Key Lime Pie with Condensed Milk but want it even creamier, fold in 1/2 cup of whipped heavy cream at the very end. This gives it a mousse like quality.
For a different twist, try using lemon or grapefruit juice. This works similarly to the lime, though grapefruit is less acidic and may require an extra 15 minutes of chilling.
- For a firmer set
- chill 6 hours instead of 4.
- For a tangier crust
- add 1 tablespoon of lime zest to the crumbs.
- For a smoother top
- use an offset spatula to level the filling.
What to Serve Beside It
Because of its tartness, the Key Lime Yogurt Pie pairs wonderfully with savory flavors. I've found that it works well alongside salted nuts or as a dessert following a Homemade Crunchwrap Supreme to create a balanced taste profile.
If you prefer to keep things sweet, garnish each slice with a thin lime wheel or a fresh raspberry. A tiny bit of salt also helps accentuate the citrus notes.
Common Myths: Some believe that hand squeezing limes is always superior to using bottled juice. While fresh is great, the pH level is what truly matters. As long as the juice is 100% pure and contains no sugar, the chemical reaction with the yogurt remains identical.
There is also a common misconception that the crust must be baked to stay stable. This isn't necessary for no-bake pies; the melted butter acts as the binder, and the time in the freezer sets the fats to ensure a firm base.
Recipe FAQs
How do I bake a graham cracker crust?
Preheat your oven to 350°F and bake the pressed crumbs for 8 to 10 minutes for a traditional toasted crust. For this specific yogurt pie, using the freezer method is better to maintain a light texture.
Is it true that store-bought crusts require baking before use?
Surprisingly, no. Most pre-made graham cracker crusts are already baked and can be filled immediately.
Where can I store a pre-made graham cracker crust?
Keep the crust in its original packaging in a cool, dry pantry until you are ready to bake. Once opened, wrap it tightly and keep it in the refrigerator.
What works as a close substitute for graham crackers?
Use crushed digestive biscuits for a very similar flavor and sandy texture. If you loved balancing the tartness in this filling, you can apply the same flavor balancing logic to our sour cream sauce.
Can the chilling time be reduced?
Stick to the full four hours to ensure the filling is stable. Shorter times often result in a runny consistency that won't hold its shape when sliced.
Key Lime Yogurt Pie