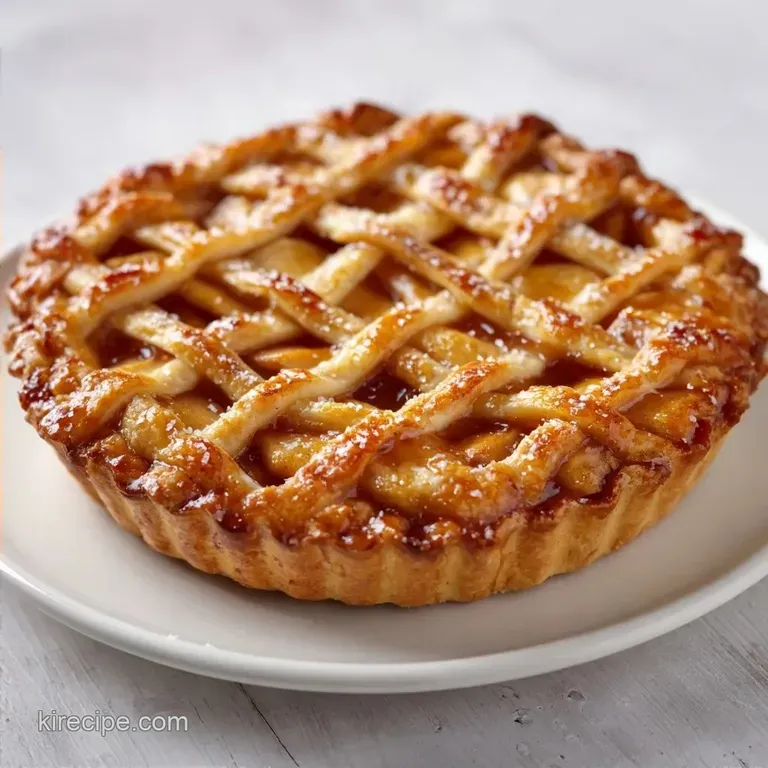
Classic Apple Pie: Crispy and Golden
- Time: 30 min active + 6 hours chilling
- Flavor/Texture Hook: Mahogany colored crisp crust with velvety, spiced apples
- Perfect for: Holiday centerpieces or a slow Sunday bake
- The Secret to a Classic Apple Pie
- Essential Timing and Yield
- The Ingredient Breakdown
- Required Kitchen Tools
- Step by Step Assembly
- Fixing Common Pie Problems
- Troubleshooting Common Issues
- Adjusting for Different Diets
- Modifying the Batch Size
- Common Baking Misconceptions
- Storage and Waste Reduction
- Visual Finishing Touches
- Recipe FAQs
- 📝 Recipe Card
The smell of warm cinnamon and bubbling sugar usually means everything is great, but then you cut into the pie and the bottom is a wet, doughy mess. I've seen it a dozen times, and honestly, it's the most frustrating part of baking. You spend hours on the crust only for the apple juices to turn the base into a sponge.
The fix isn't just about the oven temperature. It's about managing the moisture before the pie even hits the pan. This Classic Apple Pie relies on a quick stovetop simmer for the apples, which locks in the flavor and reduces the excess liquid that typically ruins the crust.
You can expect a result that looks like it came from a professional bakery. We're talking about a crust that actually shatters when you hit it with a fork and a filling that feels thick and rich, not runny. It takes a bit of patience with the chilling time, but that's where the texture happens.
The Secret to a Classic Apple Pie
Steam Pockets: Keeping butter in pea sized lumps creates tiny gaps of fat. When these hit the heat, they melt and release steam, which pushes the dough layers apart for a flaky finish.
Moisture Control: Simmering the apples for 5 minutes evaporates the raw water. This prevents the filling from releasing a flood of liquid during the 60 minutes in the oven.
Starch Binding: Cornstarch doesn't just thicken, it binds the sugars and lemon juice into a gel. This keeps the slices standing tall instead of sliding across the plate.
Cold Hydration: Ice water prevents the butter from melting during the mixing phase. If the butter melts now, you get a cookie like crust instead of a flaky one.
| Method | Bake Time | Bottom Texture | Best For |
|---|---|---|---|
| Raw Filling | 60-90 mins | Often soggy | Traditionalists who don't mind a softer base |
| Pre cooked Filling | 60 mins | Shattering crisp | Those who want a clean slice and firm crust |
Essential Timing and Yield
For this bake, precision is the only way to go. I've found that skipping even an hour of chilling time changes the way the dough handles, making it more prone to shrinking in the oven.
Precision Checkpoints:
- Flour Weight: Exactly 315g for the right hydration balance.
- Chill Window: Minimum 6 hours to allow gluten to relax.
- Final Bake: 60 minutes at 400°F (200°C) for that mahogany color.
This recipe makes one 9 inch pie, which provides 16 generous servings. Since it's a rich dessert, a thin slice is usually enough to satisfy that craving.
The Ingredient Breakdown
| Ingredient | Science Role | Pro Secret |
|---|---|---|
| All Purpose Flour | Provides structural gluten | Chill your measuring cup to keep flour cool |
| Unsalted Butter | Creates flaky layers | Freeze for 10 mins before cubing |
| Cornstarch | Stabilizes the juices | Whisk into sugar first to avoid clumps |
| Lemon Juice | Prevents browning | Use fresh lemon for the brightest acidity |
Necessary Components
- 2.5 cups (315g) all purpose flour Why this? Standard protein level for a balanced crust
- 1 cup (225g) unsalted butter, chilled and cubed Why this? High fat content for maximum flakiness
- 1 tsp (6g) salt Why this? Balances the sweetness of the apples
- 1 tbsp (12g) granulated sugar Why this? Helps the crust brown evenly
- 8 tbsp (120ml) ice cold water Why this? Binds dough without melting the fat
- 3 lbs (1.36kg) apples, peeled and sliced Why this? Mix Granny Smith and Honeycrisp for tart/sweet balance
- 0.75 cup (150g) granulated sugar Why this? Caramelizes during the stovetop simmer
- 2 tbsp (16g) cornstarch Why this? Essential for a thick, non runny filling
- 1 tbsp (8g) ground cinnamon Why this? The classic warmth and aroma
- 0.25 tsp (1g) ground nutmeg Why this? Adds a subtle, earthy depth
- 1 tbsp (15ml) lemon juice Why this? Cuts through the sugar and keeps apples bright
- 2 tbsp (28g) unsalted butter, melted Why this? Coats the apples for a velvety feel
- 1 large (50g) egg, beaten Why this? Provides the protein for a golden wash
- 1 tbsp (12g) coarse sugar Why this? Adds a crunch to the top crust
Easy Ingredient Swaps
| Original Ingredient | Substitute | Why It Works |
|---|---|---|
| All Purpose Flour | Pastry Flour | Lower protein makes a more tender, less chewy crust |
| Cornstarch | Tapioca Starch | Better clarity and a slightly chewier filling |
| Granulated Sugar | Coconut Sugar | Similar sweetness, but adds a deeper caramel note |
| Unsalted Butter | Vegan Butter | Works well, but check that it's a hard stick, not tub margarine |
If you're looking for other ways to use these pantry staples, you can try something completely different like my Almond Asian Sauce recipe which uses a similar base of toasted nuts and sugars, though obviously for a savory application.
Required Kitchen Tools
You don't need a fancy studio, but a few specific tools make the Classic Apple Pie process much smoother.
- 9 inch Pie Plate: Ceramic or glass works best for heat distribution.
- Pastry Cutter: If you don't have one, a heavy fork is a fine substitute.
- Rolling Pin: A heavy wooden one helps you apply even pressure.
- Plastic Wrap: Essential for keeping the dough discs airtight in the fridge.
- Large Mixing Bowl: For tossing those 3 lbs of apples without making a mess.
Step by step Assembly
Phase 1: Crafting the Flaky Dough
- Whisk flour, salt, and sugar in a bowl. Note: Mixing these first ensures the salt doesn't clump in one spot.
- Add chilled butter cubes and use a pastry cutter or fork to blend until the mixture resembles coarse crumbs with some pea sized lumps remaining. Note: Do not overmix; those lumps are what create the flakes.
- Add ice water one tablespoon at a time, stirring with a fork until the dough just begins to clump together. Note: Stop adding water as soon as it holds; too much water makes the crust tough.
- Divide dough into two discs, wrap in plastic, and refrigerate for at least 6 hours.
Phase 2: Preparing the Filling
- In a large bowl, combine sliced apples, lemon juice, sugar, cornstarch, cinnamon, and nutmeg.
- Pour the apple mixture into a pan over medium heat with melted butter. Cook for 5 minutes until fragrant and slightly softened. Note: This step removes the excess water that causes soggy bottoms.
- Allow the filling to cool to room temperature. Note: Putting hot filling into cold dough will melt the butter instantly and ruin the flake.
Phase 3: Assembly and Baking
- On a floured surface, roll out the first dough disc and press gently into the bottom of a 9 inch pie plate.
- Pour the cooled apple mixture into the crust, heaping it slightly in the center.
- Roll out the second disc and place it over the apples. Trim edges, fold them under, and crimp with fingers or a fork.
- Cut 4-5 slits in the top crust for steam to escape, brush with beaten egg, and sprinkle with coarse sugar.
- Bake for 60 minutes until the crust is mahogany colored and crisp.
Chef's Tip: For a truly shattering crust, freeze your butter for 10 minutes before cubing it. The colder the fat, the more distinct the layers will be after baking.
Fixing Common Pie Problems

Troubleshooting Common Issues
| Issue | Solution |
|---|---|
| Why Your Crust is Tough | Toughness usually comes from overworking the dough. When you knead flour with water, gluten develops. Too much gluten means a chewy, bread like crust instead of a flaky one. |
| Why Your Filling is Runny | This usually happens if the apples are too juicy or the cornstarch wasn't mixed in well. Pre cooking the filling usually solves this, but make sure you're using the full 2 tbsp of cornstarch. |
| Why Your Edges Burn | The edges of the pie are exposed to more heat than the center. If they turn dark brown within the first 20 minutes, you need to shield them. |
Common Mistakes Checklist:
- ✓ Did you keep the butter cold? (It should not be soft).
- ✓ Did you let the filling cool? (Hot filling = melted crust fat).
- ✓ Did you avoid over mixing? (Look for those pea sized lumps).
- ✓ Did you cut vents in the top? (Prevents the crust from exploding).
- ✓ Did you use the right apple mix? (Sweet + Tart is the golden ratio).
Adjusting for Different Diets
If you're catering to different needs, you can still get a great result. For a gluten-free version, a 1:1 GF flour blend works, but you'll need to add an extra tablespoon of ice water as GF flours absorb more moisture.
For a vegan friendly crust, use a high-quality plant based butter stick. Avoid the tub spreads, as they have too much water and won't create those flaky layers. You can replace the egg wash with a mixture of maple syrup and soy milk for that same mahogany shine.
For a lower sugar option, you can reduce the granulated sugar in the filling by 25%. To compensate for the loss of caramelization, add a pinch more cinnamon. If you're serving this as part of a bigger dessert spread, a drizzle of Black Label Chocolate Sauce on the side of a vanilla ice cream scoop makes a killer pairing.
Decision Shortcut:
- If you want a crispier bottom: Bake the pie on a preheated baking sheet.
- If you want a deeper flavor: Add 1/4 tsp of ground cloves to the filling.
- If you're short on time: Use a store-bought chilled crust, but still pre cook the apples.
Modifying the Batch Size
Scaling a Classic Apple Pie requires a bit of care, especially with the crust. You can't just double everything and hope for the best.
Scaling Down (1/2 batch): Use a 6 inch pie pan. Reduce the baking time by about 20%, but keep the temperature at 400°F. Since you can't easily use half an egg for the wash, beat one egg in a small bowl and use only half of the liquid.
Scaling Up (2x batch): Work in batches for the dough. If you try to mix 5 cups of flour and 2 cups of butter in one bowl, you'll likely overwork the dough trying to get the butter incorporated.
When baking two pies at once, lower the oven temp to 375°F (190°C) and extend the time by 10-15 minutes to ensure the heat circulates properly around both pans.
| Factor | Half Batch (6") | Double Batch (2x 9") |
|---|---|---|
| Temp | 400°F / 200°C | 375°F / 190°C |
| Time | ~45-50 minutes | ~65-75 minutes |
| Liquid | Reduce water by 50% | Reduce water by 40% |
Common Baking Misconceptions
Searing apples in butter does not "lock in the juices." It actually breaks down the pectin and softens the fruit. The reason we do it for this recipe is to evaporate the water and concentrate the flavor, not to seal the apple.
Another myth is that you should only use one type of apple. Using just Granny Smith can be too tart, and just Honeycrisp can be too sweet. Mixing two or three varieties creates a complex flavor profile that tastes more professional.
Finally, some believe that rubbing the dough is the only way to get flakes. While rubbing helps, the real magic is in the temperature. Even if you use a pastry cutter, as long as the butter stays cold, the result will be the same.
Storage and Waste Reduction
Once your Classic Apple Pie has cooled, store it under a loose dome or wrap it in foil. It stays fresh on the counter for 2 days, but the fridge will keep it for up to 4 days.
Freezing Guidelines: You can freeze the entire pie before baking. Wrap it tightly in plastic and then foil. When you're ready to eat, bake it from frozen, but add 15-20 minutes to the timer. For a guide on how to freeze and bake a frozen pie, check out this tutorial for more detailed freezing tips.
Zero Waste Tips: Don't toss those apple peels and cores. Toss them in a freezer bag and use them to simmer a quick apple cinnamon tea or start a small batch of homemade apple cider vinegar.
If you have leftover scraps of dough from trimming the edges, roll them into small balls, sprinkle with cinnamon sugar, and bake them for 10 minutes as little "pie snacks."
Visual Finishing Touches
The way a pie looks is half the battle. To get that professional look, focus on the edges. Instead of just pressing the dough down, try a braided edge or a tight crimp using a fork.
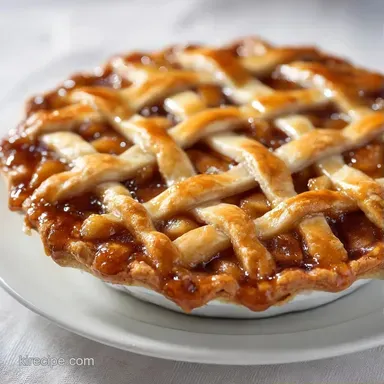
For the top, a lattice weave is the classic choice. It looks impressive and allows more steam to escape, which helps the filling thicken faster. If you aren't confident with a lattice, go for a full crust but cut a decorative leaf pattern into the top using a small knife.
Always apply the egg wash right before the pie goes into the oven. If you let it sit too long, the egg can soak into the dough and prevent that shiny, mahogany finish. Sprinkle the coarse sugar on top of the wet egg wash so it sticks and creates a sparkling, crystalline texture that contrasts with the smooth crust.
Recipe FAQs
What is the secret to a flaky crust?
Avoid overworking the dough. Kneading flour with water develops too much gluten, which creates a chewy, bread like texture instead of a flaky one.
How to prevent a runny filling?
Pre-cook the apple mixture for 5 minutes. This softens the fruit and ensures the 2 tbsp of cornstarch thickens the juices properly during baking.
Is it true that I can skip refrigerating the dough?
No, this is a common misconception. The dough must be wrapped and refrigerated for at least 6 hours to ensure the butter remains chilled for maximum flakiness.
How to stop the crust edges from burning?
Shield the edges of the pie plate. Because the edges are exposed to more heat than the center, covering them prevents over browning while the middle finishes.
How to freeze the pie for later?
Wrap the unbaked pie tightly in plastic and then foil. When ready to eat, bake directly from frozen and add 15-20 minutes to the total cooking time.
How to get a mahogany colored, crisp crust?
Brush the top with beaten egg and sprinkle with coarse sugar. Bake for 60 minutes until the crust reaches a deep golden brown color.
How to store the baked pie to keep it fresh?
Store under a loose dome or wrap in foil. It stays fresh on the counter for 2 days or in the fridge for 4 days, making it a perfect dessert to pair with a homemade crunchwrap supreme.
Classic Apple Pie