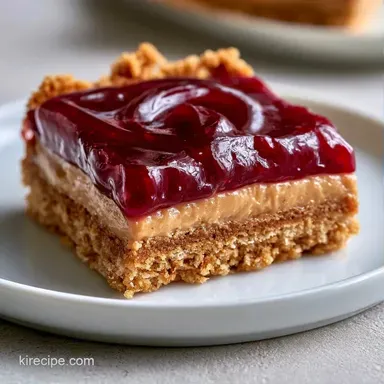
No-Bake Peanut Butter Jelly Graham Cracker Bars
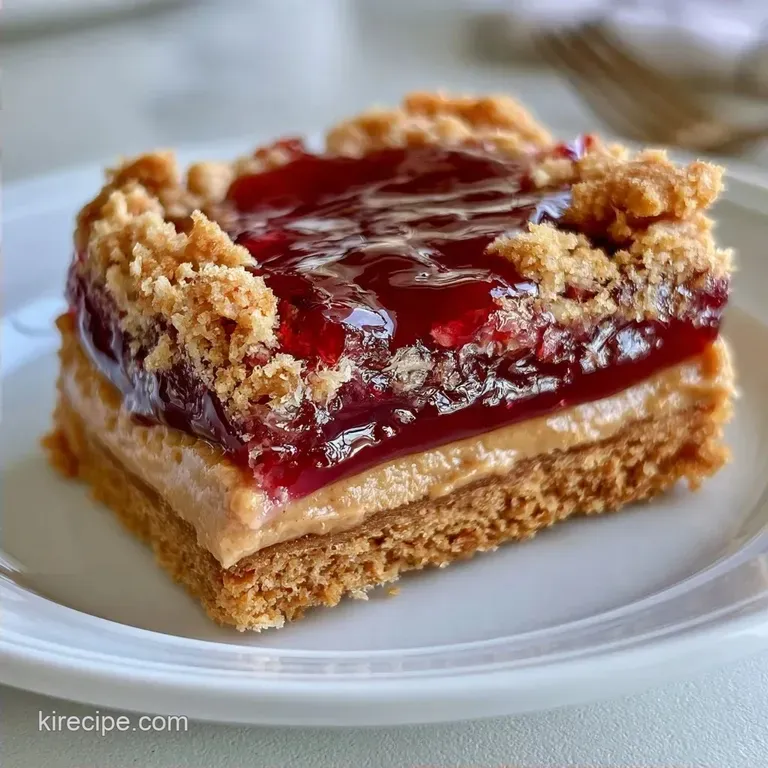
- Prep & Set: 20 min active + 2 hours chilling
- Taste & Texture: Salty peanut butter paired with a tart fruit swirl on a sandy, buttery base
- Ideal for: Children's lunchboxes or an effortless party treat
Easy Peanut Butter Jelly Graham Cracker Bars
Imagine the smell of creamy peanut butter and grape jelly filling a kitchen on a rainy Tuesday. I used to bring these to family get togethers when I wanted something that tasted like childhood but looked a bit more put together.
There is something about the way the salty peanut butter hits that tart jelly that just works every single time.
These bars avoid the common tragedy of the soggy PB&J sandwich. Instead, we build a compressed crust that holds its own against the creamy filling. You get a satisfying snap from the graham crackers and a smooth, rich center that doesn't leak.
We are focusing on precision here to make sure they don't turn into a puddle. By controlling the temperature of the butter and the chilling time, these Peanut Butter Jelly Graham Cracker Bars stay clean cut and professional. Let's get into the details.
Quick Recipe Summary
This approach focuses on fat based stability. Since we aren't baking, the structure comes from the butter and peanut butter solidifying in the cold. It's all about the temperature.
| Method | Time | Texture | Best For |
|---|---|---|---|
| No Bake | 2h 20m | Creamy & Sandy | Quick Prep |
| Traditional Baked | 1h 15m | Cakey & Soft | Dessert Platters |
Why These Bars Set Right
Keeping the components stable is the main goal here. If the fats are too warm, the bars won't hold their shape.
- Fat Solidification: We use a mix of melted and softened butter. When chilled, these fats lock together, creating a structural grid that holds the sugars and peanut butter in place.
- Cornstarch Buffer: Powdered sugar contains a tiny bit of cornstarch. This helps thicken the peanut butter layer so it doesn't feel greasy or slide off the base.
- Acid Balance: Adding lemon juice to the jelly breaks down some of the pectin. This makes the jelly more pourable and prevents it from sitting as a thick, rubbery slab on top.
If you want to make your own base from scratch, you can use homemade graham crackers for a more rustic feel.
Ingredient Deep Dive
The balance of salt and sugar is what makes these work. Too much sugar and they're cloying, too little and the peanut butter tastes flat.
| Ingredient | What It Does | Best Swap |
|---|---|---|
| Graham Cracker Crumbs | Provides a sturdy, sandy base | Digestive biscuits (denser) |
| Creamy Peanut Butter | Acts as the primary fat and flavor | Almond butter (milder taste) |
| Powdered Sugar | Sweetens and stabilizes the filling | Finely ground cane sugar (grainier) |
| Grape/Strawberry Jelly | Adds tartness and moisture | Raspberry jam (more seeds, tarter) |
Required Kitchen Tools
You don't need fancy gear, but a few specific things make the process easier.
- 9x9-inch baking pan (metal or glass)
- Parchment paper (essential for lifting the bars out)
- Hand mixer or whisk
- Medium mixing bowl
- Flat bottomed glass or offset spatula (for pressing the crust)
The Assembly Process
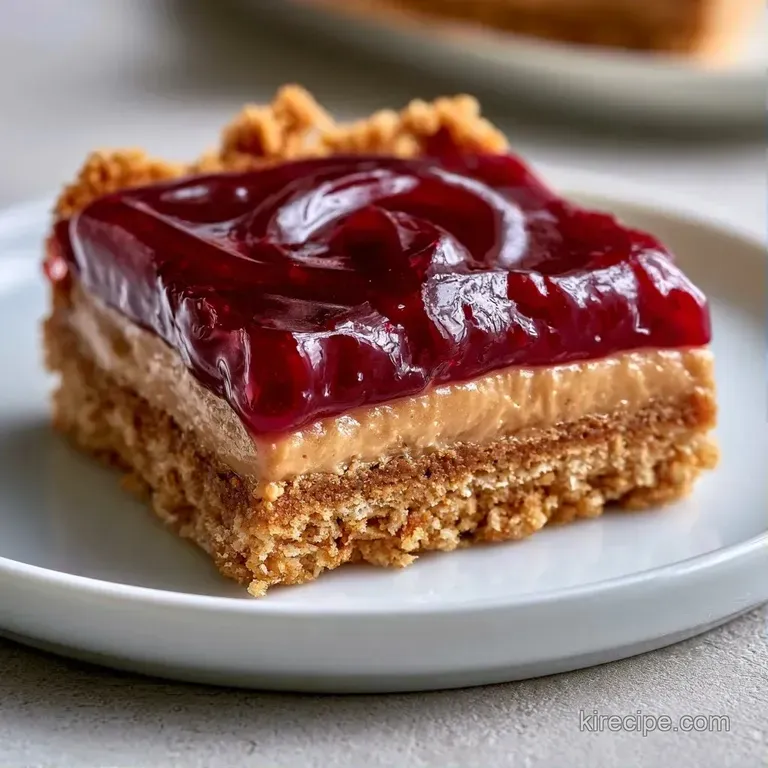
Adhere to these instructions strictly to ensure the layers remain distinct.
Phase 1: Constructing the Base
- Line a 9x9-inch pan with parchment paper, leaving a bit of overhang. Note: This allows you to lift the dessert out without it breaking.
- In a medium bowl, combine 200g graham cracker crumbs, 50g granulated sugar, and 1.5g salt.
- Stir in 115g melted unsalted butter until the texture is like wet sand.
- Press the crumbs into the pan with a flat glass. Press firmly for 2 minutes until the layer is dense and solid.
Phase 2: The Peanut Butter Filling
- Beat 255g creamy peanut butter and 57g softened unsalted butter until smooth.
- Gradually add 180g powdered sugar and 5ml vanilla extract, beating on medium speed until the mixture becomes fluffy and holds a peak.
- Spread the peanut butter filling over the base, leveling it with a spatula.
Phase 3: The Jelly Swirl
- Microwave 120g jelly for 15-20 seconds until it bubbles slightly and is easy to pour.
- Stir in 5ml lemon juice.
- Spoon the warm jelly over the peanut butter and create swirls with a toothpick.
- Refrigerate for 2 hours until the peanut butter layer is firm to a light touch.
Chef's Note: To achieve clean cuts, cleanse your knife with hot water and dry it before each slice. This stops the peanut butter from sticking to the metal and smearing the jelly.
Solving Texture Problems
Most issues with these bars come down to temperature or pressure. If the base is too loose, the whole bar falls apart. If the filling is too warm, the jelly sinks to the bottom.
The Crust is Crumbling
This usually happens if the butter wasn't fully integrated or the pressing wasn't firm enough. Ensure the crumbs are evenly moistened and use a heavy glass to pack them down.
The Filling is Runny
If the peanut butter layer doesn't set, it's often because the butter was too melted or the fridge wasn't cold enough. You can fix this by popping them in the freezer for 30 minutes before slicing.
The Jelly Sinks
If the jelly is too hot when poured, it will melt the peanut butter layer and sink. Let the warmed jelly cool for 60 seconds before spooning it on.
| Problem | Root Cause | Solution |
|---|---|---|
| Crumbling Base | Under pressed crumbs | Press again with a flat glass |
| Runny Center | Insufficient chilling | Freeze for 30 minutes |
| Muddy Swirl | Over mixing the jelly | Swirl only 3-4 times |
Adjusting Batch Sizes
To make a different amount of bars, maintain the ratios but select a different pan size.
Half Batch: Substitute the square pan for a loaf pan. Shorten the chilling time by approximately 20%, ensuring they still set for at least 90 minutes.
Double Batch: Choose a 9x13-inch pan. To keep flavors balanced, increase the salt and vanilla by 1.5x rather than 2x. Due to the increased volume, extend the chilling period to 3 hours.
Decision Shortcut: Want more tang? → add 2ml more lemon juice to the jelly Prefer a saltier taste? → use salted butter in the base Looking for extra crunch? → replace 50g of crumbs with crushed peanuts
Storage and Freshness
Keep these in a sealed box in the cooler for up to 96 hours. They actually taste better on day two because the flavors have more time to meld.
For long term keeping, wrap individual bars in parchment paper and store them in a freezer safe container for 3 months. To eat them, let them sit at room temperature for 15 minutes.
To avoid waste, if you have leftover peanut butter filling, stir in a bit of honey and use it as a dip for apple slices. If you have extra jelly, stir it into plain Greek yogurt for a quick breakfast.
Dietary Adaptations
You can tweak the ingredients to fit different needs without losing the spirit of the dish.
For a gluten-free Treat: Use certified gluten-free graham cracker crumbs. The rest of the ingredients are naturally gluten-free, so the texture remains identical.
For a Nut Free Version: Substitute the peanut butter with sunflower seed butter (SunButter). It has a similar fat content and a deep, toasted flavor. Note that the color will be darker, and the taste is slightly more earthy.
For a Vegan Option: Use vegan butter sticks and a honey free jelly. For the powdered sugar, ensure it's processed without bone char. If you love bold peanut flavors, check out my Vietnamese peanut sauce recipe for other ways to use nut butters.
| Original Ingredient | Substitute | Why It Works |
|---|---|---|
| Butter (all) | Coconut Oil (solid) | Similar saturated fat; Note: adds a coconut hint |
| Powdered Sugar | Maple Sugar | Natural sweetener; Note: results in a grainier texture |
| Grape Jelly | Apricot Jam | Similar acidity; Note: creates a more "grown up" flavor |
Serving and Plating
Since these Peanut Butter Jelly Graham Cracker Bars are straightforward, you can really have fun with the presentation.
The Classic Pairing
Pair these treats with a chilled glass of milk or a steaming cup of coffee. The bold coffee flavor balances the richness of the peanut butter perfectly.
The Gourmet Platter
Place the bars on a wooden serving board alongside sliced bananas and fresh berries. For a polished finish, add a light dusting of powdered sugar.
Pro Tip for Cutting
Let the bars cool entirely before slicing. Using a long, thin knife, dip the blade in hot water and wipe it dry. Press straight down in one motion; avoid sawing, as this can ruin the jelly swirl.
Recipe FAQs
Is there a close substitute for graham cracker crumbs?
For the best results, use crushed digestive biscuits. If you enjoyed perfecting this crumb, try a similar approach in our classic apple pie.
How to prepare the graham cracker base?
Stir graham cracker crumbs, sugar, and salt together. Mix in melted butter until the mixture resembles wet sand and press firmly into a 9x9-inch pan.
Is it true that you must bake the base for it to set?
Actually, no. This recipe uses a no-bake method where the base sets firmly once refrigerated for at least 2 hours.
What's the best way to create a marbled swirl?
Spoon warmed jelly over the peanut butter layer. Use a toothpick or knife to gently swirl the colors together before chilling.
Where should I store these bars to keep them fresh?
Keep them in a sealed box in the cooler. This preserves the texture for up to 96 hours, and flavors often meld better by the second day.
Can these treats be frozen for later?
Yes, wrap them in parchment paper. Store them in a freezer safe container for up to 3 months and let them thaw at room temperature for 15 minutes.
Peanut Butter Jelly Graham Bars