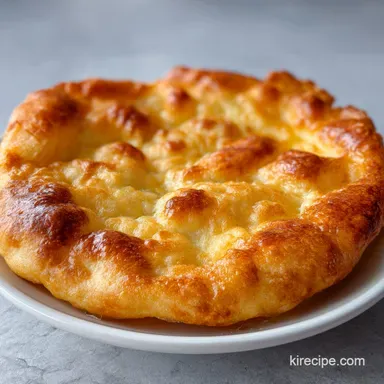
Authentic Navajo Fry Bread: Golden and Fluffy
- Time:20 minutes active + 15 minutes resting = Total 45 minutes
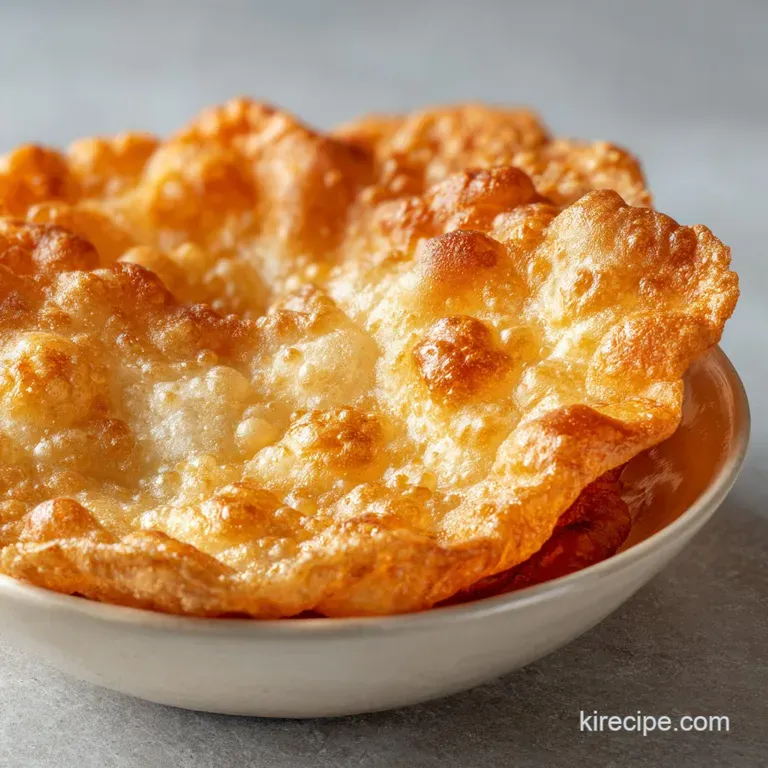
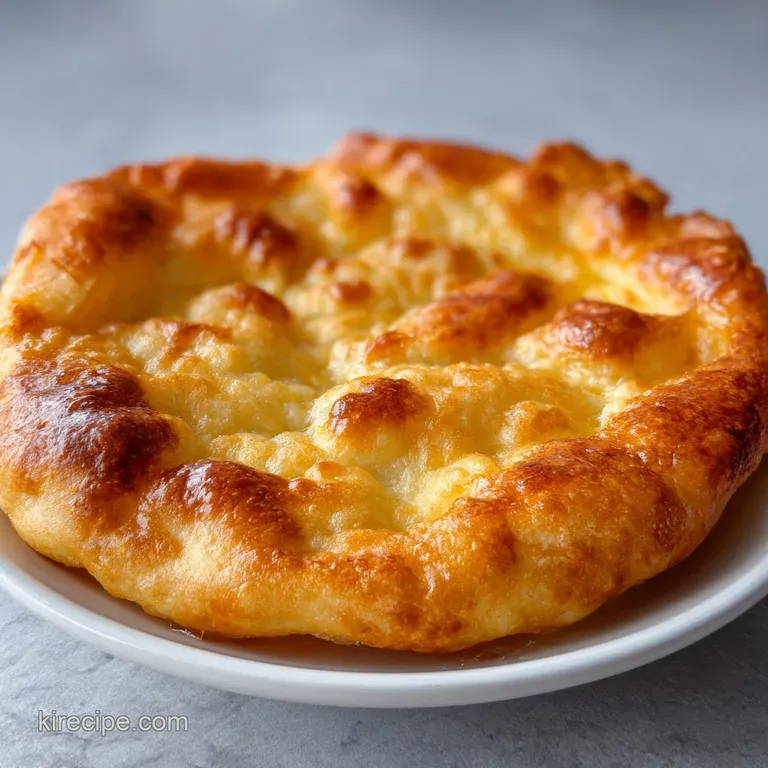
- Flavor/Texture Hook: Golden, bubbly exterior with a velvety, soft interior
- Perfect for: Family brunch or as a base for savory Navajo tacos
The Best Navajo Fry Bread Recipe
The first thing you'll notice is that aggressive sizzle the second the dough hits the oil. It's a sound that tells you everything is going right. I remember the first time I tried this, I was so eager to get them in the pan that I skipped the resting phase and kneaded the dough like I was preparing a sourdough.
The result? A dense, rubbery disk that felt more like a frisbee than bread. It was a total disaster, but it taught me that patience is actually an ingredient in this recipe.
Once I learned to just leave the dough alone, everything changed. I watched as the first piece expanded, creating those signature bubbles that shatter slightly when you bite into them.
The aroma of toasted flour and warm milk fills the kitchen, and suddenly, you've got this gold standard bread that works for almost anything. It's a simple process, but the magic is in the restraint.
Trust me on this, don't overthink it. We're looking for a soft, tacky dough, not a polished ball of clay. If you treat the dough gently, it rewards you with a texture that's practically cloud like. Let's crack on and get these bubbling.
The Bubble Secret
Getting those airy pockets isn't luck, it's a specific interaction between the leavening agent and the heat. When the baking powder hits the 350°F oil, it releases carbon dioxide rapidly, pushing the dough outward before the structure sets.
- Gluten Relaxation
- Letting the dough sit for 15 minutes allows the protein strands to loosen, preventing the bread from shrinking back.
- Thermal Shock
- The high heat of the oil causes moisture in the dough to evaporate instantly, creating the signature bubbles.
- Tackiness Factor
- Keeping the dough slightly sticky ensures it doesn't become too dense, allowing for a more velvety interior.
| Method | Time | Texture | Best For |
|---|---|---|---|
| Stovetop | 10 minutes | Bubbly and Crispy | Authentic taste |
| Air Fryer | 15 minutes | Drier and Tighter | Lower fat options |
Ingredient Breakdown
Selecting the right components is where the precision comes in. You don't need fancy flour here, but the temperature of your liquids can change the entire outcome.
| Ingredient | Science Role | Pro Secret |
|---|---|---|
| All Purpose Flour | Provides the structural framework | Measure by spooning into cup to avoid packing |
| Baking Powder | Primary lift and aeration | Check expiration date; old powder means flat bread |
| Warm Milk | Hydrates and softens the crumb | Warmth activates the powder faster than cold milk |
| Vegetable Oil | Heat transfer medium | Use an oil with a high smoke point to avoid burnt taste |
Necessary Kitchen Tools
You don't need a lab, but a few specific tools make this foolproof. A cast iron skillet is my go to because it holds heat way better than thin aluminum, meaning the oil temperature doesn't plummet when you add the dough.
For the dough, a large mixing bowl and a sturdy spoon will do. I prefer a clean kitchen towel for covering the bowl, as it keeps the moisture in without trapping too much heat. To get the bread out of the oil, a slotted spoon is non negotiable, or you'll be fighting a losing battle with dripping oil.
The Cooking Process
Right then, let's get into the actual making. Remember, the goal is to be gentle with the dough.
- Whisk the all purpose flour, baking powder, and salt in a large mixing bowl. Note: This ensures the leavening is evenly distributed.
- Slowly pour in the warm milk, stirring with a spoon until a soft, tacky dough forms. Mix only until the flour is incorporated to avoid over working the dough.
- Cover the bowl with a clean kitchen towel and let the dough rest for 15 minutes to relax the gluten.
- Heat vegetable oil in a cast iron skillet or deep frying pan until it reaches 350°F (175°C).
- Pinch off a golf ball sized piece of dough and flatten it into a disc approximately 1/4 inch thick.
- Carefully slide the dough into the hot oil and fry for 2–3 minutes per side until golden brown and bubbly.
- Remove with a slotted spoon and drain on paper towels.
Chef's Tip: To keep the bread from absorbing too much oil, make sure your dough is exactly 1/4 inch thick. If it's too thick, the outside burns before the middle cooks; too thin, and it becomes a cracker.
Fixing Dough Issues
If your bread isn't bubbling or feels too tough, it's usually a temperature or handling issue. Most people panic and add more flour when the dough feels tacky, but that's actually the biggest mistake you can make.
Tough or Rubbery Bread
This happens when you over mix the dough, creating too many gluten bonds. If the dough feels like a rubber ball, you've gone too far.
| Problem | Root Cause | Solution |
|---|---|---|
| Tough Texture | Over kneading | Mix only until incorporated |
| No Bubbles | Cold oil or old powder | Use a thermometer for 350°F oil |
| Greasy Finish | Oil temp too low | Heat oil longer before frying |
- ✓ Pat your hands with a tiny bit of oil instead of adding extra flour to the dough.
- ✓ Use a thermometer to verify the oil is exactly 350°F.
- ✓ Let the dough rest for the full 15 minutes, no shortcuts.
- ✓ Work in batches so the pan temperature stays consistent.
Creative Flavor Swaps
You can easily tweak the base to change the vibe of the meal. If you want something with a bit more earthiness, you can replace a small portion of the flour with cornmeal, similar to the texture found in a Southern Cornbread Cake.
| Original Ingredient | Substitute | Why It Works |
|---|---|---|
| Warm Milk (1 cup) | Warm Water (1 cup) | Lighter texture. Note: Less richness than milk |
| All Purpose Flour | Bread Flour (3 cups) | Chewier bite. Note: Requires longer resting time |
| Vegetable Oil | Peanut Oil (2 cups) | Higher smoke point. Note: Adds a subtle nutty flavor |
If you're looking for a completely different style of bread, you might enjoy the slower process of an Easy Dutch Oven Bread, though it lacks the immediate gratification of the fry pan.
Storage and Waste
Fried bread is best eaten the second it hits the plate, but leftovers happen. Keep them in a paper bag or a loose container in the fridge for up to 2 days. Avoid airtight plastic bags while they're still warm, or they'll steam and turn soggy.
To reheat, skip the microwave. Toss them back into a dry skillet over medium heat or pop them in a toaster oven for 3 minutes. This brings back that shatter crisp exterior.
For zero waste, if you have a bit of leftover raw dough, you can roll it into tiny balls and fry them as "doughnut holes," tossing them in cinnamon sugar for a quick treat.
Perfect Pairing Ideas
This bread is a blank canvas. The most traditional way to serve it is as Navajo tacos, topping the bubbly bread with seasoned ground beef, shredded lettuce, diced tomatoes, and a dollop of sour cream.
For something more unexpected, I love pairing this bread with a rich, creamy curry. The way the bread soaks up a silky Butter Chicken sauce is honestly a game changer for dinner night.
If you're leaning toward a sweet morning meal, try these with a drizzle of honey and a side of fresh berries. The contrast between the salty, fried dough and the floral honey is brilliant.
Recipe FAQs
What is the best flour for Navajo fry bread?
All-purpose flour. It provides the ideal protein content to create a bread that is sturdy enough to fry but soft enough to remain pillowy.
What makes Navajo fry bread unique?
Its contrast between a shatter crisp exterior and a soft, airy center. Unlike baked breads, it relies on baking powder for a quick lift and is cooked in hot oil for a rich, bubbly texture.
What are the common mistakes when frying bread?
Over mixing the dough or using oil below 350°F. Over working the flour makes the bread tough, while oil that isn't hot enough causes the dough to absorb excess grease and become soggy.
How to make the best fried bread?
Mix the dough only until the flour is incorporated and let it rest for 15 minutes. This relaxes the gluten, allowing the bread to puff up properly when it hits the hot vegetable oil.
Is it true I must knead the dough for 10 minutes to make it fluffy?
No, this is a common misconception. Extensive kneading develops too much gluten, which results in a dense, chewy bread rather than a light, fluffy one.
How to reheat leftover fry bread without it getting soggy?
Toast in a dry skillet over medium heat or use a toaster oven for 3 minutes. Avoid the microwave, as it steams the bread and destroys the crisp exterior.
What are the best toppings for Navajo fry bread?
Honey, jam, or savory toppings like seasoned beans. For a zesty, creamy pairing, try dipping your bread into a chipotle sauce.
Navajo Fry Bread Recipe