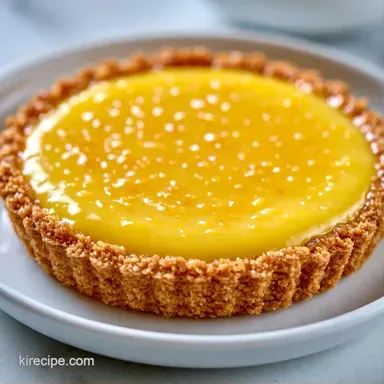
Graham Cracker Crust Lemon Bars

- Time: 15 min active + 2 hours 30 mins chilling
- Flavor/Texture Hook: Zesty and dense with a salty-sweet crunch
- Perfect for: Spring brunch or a refreshing treat for company
The aroma of fresh citrus always brings back memories of classic American bake sales. Throughout my childhood, these squares were a mainstay at every family gathering in April. There is something about the pairing of tangy lemon and a sugary crust that feels like spring in a baking pan.
I've focused on perfecting the method to eliminate the common issue of a soggy bottom. While many simply press the crumbs down and pour the filling on top, that's usually where the texture fails. To keep these bars crisp, a specific sequence is essential.
You can look forward to a dessert that is intensely tangy and decadent. Rather than a light mousse, this is a substantial, creamy square that maintains its form. While the chilling period requires patience, it is the only way to achieve those clean, professional edges.
The Best Lemon Bars With Graham Crust
Right then, let's get into the specifics. For this recipe, we're aiming for a very specific balance of salt and acid. I use a scale for the crumbs and butter because too much fat makes the crust greasy, and too little makes it crumble.
If you're looking for something different, you might like my Peach Crisp recipe for another fruit forward treat. But for now, let's focus on the citrus.
Why This Version Works
The Par Bake: Baking the crust for a few minutes seals the crumbs. This creates a barrier so the lemon juice doesn't turn the base into mush.
Condensed Milk: Using this instead of flour creates a denser, more concentrated flavor. It gives the filling a rich weight that traditional custards lack.
The Jiggle: Pulling the pan out while the center still moves slightly prevents the eggs from overcooking. This keeps the texture smooth rather than spongy.
| Fresh Lemon Juice | Bottled Juice | Taste Impact | Texture Result |
|---|---|---|---|
| Squeezed fresh | store-bought | Bright, zesty | Clean, sharp |
| Bottled | Concentrated | Flat, metallic | Slightly syrupy |
Ingredients For These Bars
| Component | Purpose | Substitute Notes |
|---|---|---|
| Graham Crumbs | Structural base | Digestive biscuits: Similar crunch, slightly saltier |
| Condensed Milk | Sweetness & Body | Evaporated milk + sugar: Less stable, more liquid |
| Fresh Lemon Juice | Acid & Flavor | Lime juice: Works well, creates a "Key Lime" vibe |
| Eggs | Binding agent | Flax eggs: Not recommended, won't set the custard |
The Crust
- 1 1/2 cups (150g) graham cracker crumbsWhy this? Provides the classic honey wheat flavor
- 1/3 cup (65g) melted unsalted butterWhy this? Binds crumbs without adding salt
- 2 tbsp (25g) granulated sugar
- 1/4 tsp (1.5g) salt
The Filling
- 1 can (14 oz / 397g) sweetened condensed milkWhy this? Creates a dense, fudge like texture
- 2 large (100g) eggs, room temperatureWhy this? Room temp prevents the milk from seizing
- 1/2 cup (120ml) fresh lemon juiceWhy this? Fresh acid cuts through the sugar
- 1 tbsp (6g) lemon zest
- 1/4 tsp (1.5g) salt
Essential Baking Tools
While a basic setup works, a few specific items simplify the process. An 8x8 inch square pan is required; using a 9x9 version will leave your Lemon Bars too thin and prone to overbaking.
I strongly suggest using parchment paper. Simply greasing the pan often makes removal a struggle, so line it with paper that hangs over two sides to act as handles.
For the filling, all you'll need is a medium bowl and a whisk. If you have a fine mesh strainer, use it to filter the lemon juice and catch any remaining seeds.
Making These Lemon Bars
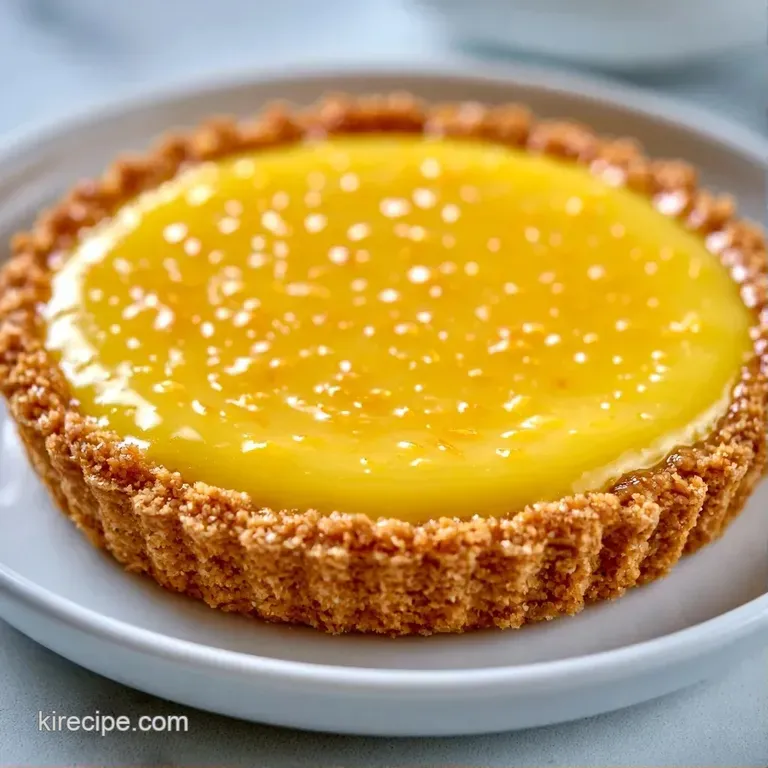
1. Preparing the Crust
Set your oven to 350°F (175°C). Line an 8x8 inch pan with parchment paper, leaving a bit of an overhang. In a mixing bowl, combine the graham cracker crumbs, sugar, and 1.5g salt. Stir in the melted butter until the texture resembles wet sand. Firmly press the mixture into the bottom of the pan.
Bake for 8-10 minutes until the edges are lightly browned.
2. Mixing the Lemon Filling
While the crust bakes, whisk together the sweetened condensed milk and eggs until the mixture is smooth. Gently fold in the lemon zest, fresh lemon juice, and 1.5g salt. Stir slowly to prevent air bubbles, which can cause the surface to crack.
3. Final Baking
Spread the lemon mixture over the hot crust. Return the pan to the oven and bake for 18-22 minutes. Check that the edges have set, but ensure the center still has a slight jiggle when you shake the pan.
4. Cooling and Setting
Allow the Lemon Bars to cool at room temperature for 30 minutes. Then, transfer the pan to the refrigerator to chill for 90 minutes. This step ensures the filling is firm enough to cut into neat squares.
Chef's Note: To achieve a clean cut, wipe your knife with a warm, damp cloth between each slice.
Fixing Common Problems
Dealing with a cracked top is the most common issue. This usually happens if the oven is too hot or you left them in too long. If it happens, just dust the top with powdered sugar to hide the gaps.
Another problem is a crust that crumbles when you lift it. This is almost always due to not pressing the crumbs firmly enough into the pan. Use the flat bottom of a measuring cup to really pack it down.
If the filling feels too soft or doesn't set, you might have used too much lemon juice or the eggs were too small. Ensure you're using large eggs and measuring the juice accurately.
Filling Surface Cracks
Crumbling Base
Soft Filling
| Problem | Root Cause | Solution |
|---|---|---|
| Cracked Top | Overbaked | Pull out when center jiggles |
| Soggy Crust | No par bake | Bake base 8-10 mins first |
| Runny Center | Underbaked | Bake 2-3 more minutes |
Adjusting The Batch Size
To make a smaller portion, you can halve the ingredients and use a loaf pan. Since the recipe calls for half an egg, whisk one egg in a container and measure out exactly half. Decrease the baking time for the filling by roughly 20%.
For a double batch, I recommend using two pans instead of one deep one. Scaling up the filling in a single dish often causes the edges to burn before the center is set. If you prefer a larger pan, lower the temperature to 325°F and increase the bake time.
Exercise caution with the salt when scaling. I only increase the salt to 1.5x, even when doubling the other components. Too much salt can overpower the brightness of these Lemon Bars.
Storage And Waste Tips
Keep these in a container with a lid in the fridge. They stay fresh for about 4 days. If you're not eating them right away, place a piece of parchment paper between layers so they don't stick together.
You can freeze these for up to 2 months. Wrap each square individually in plastic wrap and store them in a freezer bag. Thaw them in the fridge overnight before serving.
Don't throw away your lemon peels. I usually zest them first, then toss the peels into a jar with vodka or sugar to make lemon extract or candied peel. It's an easy way to avoid waste.
Fun Flavor Swaps
Lemon Cheesecake Twist: Beat 4 oz of softened cream cheese into the graham cracker base for a richer, more stable crust. This makes the Cracker Crust Lemon Bars feel more like a dessert tart.
The Coconut Cloud: Replace half of the graham crumbs with toasted shredded coconut. This works great for Crust Lemon Bars if you want a tropical feel.
Berry Swirl: After pouring the lemon filling, drop small dots of raspberry jam on top and swirl them with a toothpick. This creates a beautiful pattern in your Graham Cracker Crust Lemon Bars.
Dairy-free Option: Use a condensed coconut milk substitute and vegan butter. Note that the texture will be slightly softer, and you may need to chill them for an extra hour.
For other fruity ideas, try my Peach Crisp recipe if you have extra fruit on hand.
What To Serve Together
Since these are quite rich, I recommend serving them with something light. A few fresh raspberries or blueberries on the side provide a vibrant visual and a touch of acidity.
To create a full brunch spread, these pair perfectly with a Traditional Italian Pasta Salad to offset the sweetness with savory notes. A cup of strong black coffee or an iced Earl Grey tea also helps balance the creaminess of the condensed milk.
Decision Shortcut:
- Extra tang? → stir in 1 tsp lemon zest
- Sweeter base? → mix in 1 tbsp brown sugar
- Less tart? → use 1 tbsp less juice
Whether these are for a party or a weekend indulgence, patience is key. Don't rush the cooling time. Once you cut into the Lemon Bars and see those clean, sharp edges, you'll know it was worth the wait. Enjoy your homemade Lemon Bars!
Recipe FAQs
What is a good substitute for graham crackers?
Digestive biscuits or crushed shortbread are the closest alternatives.
Tip: since you're mastering the buttery crust ratio here, you can apply the same logic to the crust in a classic apple pie.
How do I bake a graham cracker crust?
Press the crumb mixture firmly into the pan and bake at 350°F for 8 10 minutes.
Tip: use the back of a spoon to ensure the edges are packed tight.
Why did my lemon filling get air bubbles?
Whisking the eggs and condensed milk too vigorously incorporates excess air.
Tip: stir the lemon juice and zest in gently by hand.
When is the best time to slice the bars?
Let them cool at room temperature for 1 hour, then chill for 2 hours before slicing.
Tip: Using a warm blade between cuts ensures a cleaner finish.
Is it true that these bars don't need to be refrigerated before slicing?
No, this is a common misconception.
Tip: skipping the refrigeration prevents the filling from setting, making the bars difficult to cut.
Graham Cracker Lemon Bars