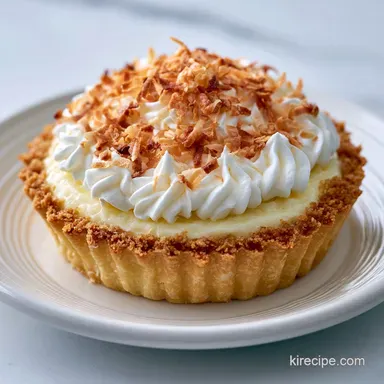
Barefoot Contessa Coconut Cream Pie: Velvety and Rich
- Time:30 minutes active + 4 hours chilling = Total 5 hours
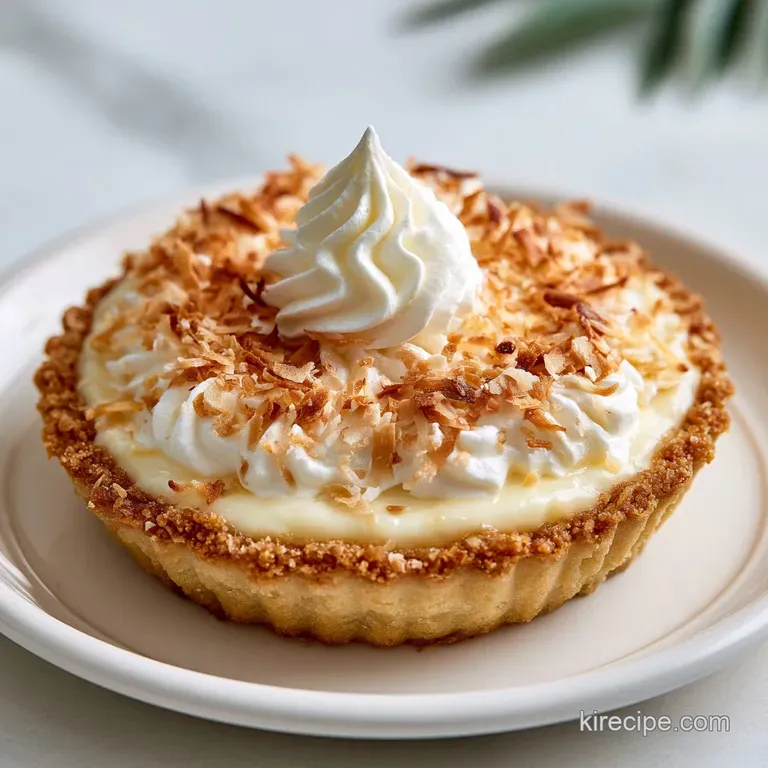
- Flavor/Texture Hook: Velvety coconut custard topped with a cloud like whipped cream
- Perfect for: Holiday dinner parties or an impressive Sunday dessert
- Barefoot Contessa Coconut Cream Pie
- Why Other Custards Fail
- The Component Analysis
- Ingredients
- The Kitchen Toolkit
- Step by Step Assembly
- Fixing Common Texture Issues
- Troubleshooting Common Issues
- Switching Up the Ingredients
- Adjusting the Batch Size
- Truths About Coconut Pies
- Storage and Freezer Tips
- Serving the Final Slice
- Recipe FAQs
- 📝 Recipe Card
That specific smell of toasted coconut hitting a hot pan is enough to trigger a core memory for me. I remember the first time I tried making a coconut cream pie for a neighborhood potluck. I skipped the toasting step, thinking the coconut would just "cook" in the custard.
The result was a pale, bland filling that felt more like a lukewarm porridge than a dessert. It was a disaster, but it taught me that the flavor is all in the browning.
Since then, I've leaned into the precision of the barefoot contessa coconut cream pie. There is something about the way the heavy cream cuts through the richness of the coconut that just works. It's not just a sweet treat, it's a study in textures.
You get the crunch of the pastry, the silkiness of the custard, and the airy lift of the cream. Once you get the temperature of the custard right, it's a total win.
Barefoot Contessa Coconut Cream Pie
When you first dive into a coconut cream pie recipe, it's easy to think it's just "milk and coconut." But this specific version is different. The goal here is a custard that doesn't weep and a crust that doesn't go soggy under the weight of the filling.
We're looking for that specific, clean slice that holds its shape on the plate.
The beauty of the barefoot contessa coconut cream pie is its reliability. It's a recipe that rewards attention to detail. If you rush the cooling process or overbeat the cream, you lose that professional finish.
But if you follow the checkpoints, you'll end up with a dessert that tastes like it came from a high end bakery.
Trust me, the wait time is the hardest part. Watching that pie sit in the fridge for four hours is a test of will. But that's where the magic happens. The flavors meld, the starches stabilize, and the custard transforms from a thick liquid into a velvety slice of heaven.
Why Other Custards Fail
Most home cooks struggle with custard because they treat it like a soup. In reality, it's a delicate balance of proteins and starches. Here is what's actually happening in the pan.
Starch Activation: Cornstarch only thickens once it hits a specific temperature, which is why you must see those first bubbles. If you pull it off too early, the pie will be runny.
Protein Binding: Egg yolks provide the richness and help the custard hold its structure. They act as the glue that keeps the fats from the milk and coconut from separating.
Fat Integration: Adding butter at the very end creates a glossy finish. This is a technique that prevents the filling from looking matte or grainy.
Temperature Stability: Cooling the crust completely before filling prevents the bottom from steaming. If the crust is warm, it will melt the bottom layer of custard, creating a soggy base.
| Fresh Coconut | Shortcut (Canned/Dried) | Impact | Savings |
|---|---|---|---|
| Freshly Grated | Sweetened Shredded | Fresh is nuttier, but shredded is more consistent | High |
| Homemade Crust | store-bought Shell | Homemade shatters; store-bought is often too dense | Medium |
| Fresh Vanilla Bean | Vanilla Extract | Bean adds specks and depth; extract is punchy | Low |
The difference between a homemade approach and a shortcut is mostly about the "shatter" factor. A store-bought crust simply cannot compete with the flaky layers of a chilled butter pastry.
The Component Analysis
Understanding how each ingredient behaves helps you avoid common pitfalls. For instance, using the wrong type of milk can throw off the thickness.
| Ingredient | Science Role | Pro Secret |
|---|---|---|
| Cornstarch | Thickening Agent | Whisk it with sugar first to avoid clumps |
| Egg Yolks | Emulsifier | Room temperature yolks blend smoother into the milk |
| Half and Half | Fat Balance | Provides a creamier mouthfeel than just milk |
| Chilled Butter | Flakiness | Keep it cubed and cold to create steam pockets |
Ingredients
For the best result, make sure your dairy is cold and your butter is chilled.
For the Buttery Crust
- 1.5 cups all purpose flourWhy this? Standard protein content for a sturdy yet flaky base
- 0.5 cup unsalted butter, chilled and cubedWhy this? Cold fat creates the layers that shatter
- 0.25 tsp saltWhy this? Balances the richness of the butter
- 4 tbsp ice waterWhy this? Binds dough without melting the butter
- Substitute: Use a pre made shortcrust pastry if you're short on time, though it's less flaky.
For the Coconut Custard
- 1 cup whole milkWhy this? Essential for a rich, creamy base
- 1 cup half and halfWhy this? Adds a velvety texture
- 0.5 cup granulated sugarWhy this? Standard sweetness that dissolves easily
- 3 tbsp cornstarchWhy this? The primary stabilizer for the filling
- 3 large egg yolksWhy this? Adds color, richness, and stability
- 0.25 tsp saltWhy this? Enhances the coconut flavor
- 1 cup sweetened shredded coconut, toastedWhy this? Toasting unlocks the nutty oils
- 1 tsp pure vanilla extractWhy this? Adds a floral aromatic layer
- 2 tbsp unsalted butterWhy this? Creates a glossy, smooth finish
- Substitute: Coconut milk can replace the half and half for a more intense coconut flavor, according to USDA FoodData, though it may slightly alter the set.
For the Cloud Topping
- 2 cups heavy whipping cream, coldWhy this? High fat content for stiff peaks
- 0.25 cup powdered sugarWhy this? Dissolves instantly for a smooth cream
- 2 tsp pure vanilla extractWhy this? Ties the topping to the filling
- 0.5 cup toasted shredded coconutWhy this? Adds visual contrast and crunch
- Substitute: Mascarpone mixed with whipped cream for a denser, richer topping.
The Kitchen Toolkit
You don't need a professional lab, but a few specific tools make this barefoot contessa coconut cream pie much easier.
- Food Processor: Essential for the crust to keep the butter cold.
- 9 inch Pie Plate: The standard size for this volume of filling.
- Heavy bottomed Saucepan: Prevents the custard from scorching on the bottom.
- Whisk: For getting those lumps out of the cornstarch mixture.
- Electric Mixer: To get those stiff peaks in the cream without your arm falling off.
- Parchment Paper & Pie Weights: To keep the crust from bubbling up during the blind bake.
Step by step Assembly
Right then, let's get into it. This is a three phase process. Don't try to rush the cooling, or you'll end up with a puddle.
Phase 1: The Shattering Crust
- Pulse flour and salt in a food processor. Add the chilled, cubed butter and pulse just until pea sized crumbs form. Note: Don't over process or the crust will be tough.
- Slowly add ice water, one tablespoon at a time, until the dough just holds together when pressed. Roll it out on a floured surface and fit it into your 9 inch pie plate.
- Line the crust with parchment paper and fill with pie weights. Bake at 375°F (190°C) for 15 minutes.
- Remove the weights and parchment, then bake for another 10 minutes until the edges are a pale gold. Let it cool completely on a wire rack.
Phase 2: The Velvety Coconut Filling
- In your heavy bottomed saucepan, whisk together the sugar, cornstarch, and salt. Slowly stir in the milk, half and half, and egg yolks until the mixture is completely smooth.
- Heat the mixture over medium heat, stirring constantly. Once the mixture begins to bubble and thickens to a pudding like consistency (usually about 5-7 minutes), remove it from the heat immediately. Note: Constant stirring is key to avoid scorched milk.
- Stir in the toasted coconut, vanilla, and butter. Keep stirring until the butter is melted and the filling is glossy.
- Pour the coconut custard into the cooled crust. Now, the hard part: refrigerate for 4 hours to let it set fully.
Phase 3: The Cloud Like Finishing Touch
- Beat the cold heavy whipping cream, powdered sugar, and vanilla extract. Continue beating until stiff peaks form (where the cream stands straight up when the whisk is lifted).
- Spread the whipped cream over the chilled custard. Garnish with the remaining toasted shredded coconut for that final crunch.
Chef's Tip: To get the most flavor, toast your coconut in a dry pan over medium heat for 3-5 minutes. It happens fast once it smells like a tropical vacation and turns golden, take it off the heat immediately.
Fixing Common Texture Issues

Even with a great recipe, things can go sideways. Most issues with the barefoot contessa coconut cream pie come down to temperature or over mixing.
Troubleshooting Common Issues
| Issue | Solution |
|---|---|
| Filling too runny | This usually happens if the cornstarch didn't reach its "gelatinization" point. If you didn't see the mixture bubble, it didn't thicken. You can try reheating it, but it's better to ensure it bubbles |
| Why did my whipped cream turn into butter | Overbeating is the culprit here. Once you hit stiff peaks, stop. If it looks grainy, you've gone too far. You can sometimes save it by gently folding in a tablespoon of liquid cream with a spatula. |
| I don't have pie weights | You can use dried beans or uncooked rice. Just make sure they are in a parchment paper lining so they don't stick to your crust. |
Consistency Checklist:
- ✓ Butter is chilled and cubed, not softened.
- ✓ Custard reached a bubble before being removed from heat.
- ✓ Crust is completely cold before the filling goes in.
- ✓ Whipped cream stopped exactly at stiff peaks.
- ✓ Coconut was toasted until golden, not burnt.
Switching Up the Ingredients
If you're looking to tweak this recipe, there are a few ways to do it without ruining the structure. For those who love a deep, rich flavor, you might consider adding a drizzle of Black Label Chocolate Sauce over a slice for a coconut chocolate combo.
For a lighter version, you can replace the half and half with whole milk, but be aware that the custard will be slightly less velvety. If you want a more tropical vibe, use coconut cream in place of the heavy cream in the topping, though you'll need to whip it longer.
If you prefer a different type of crust, a graham cracker crust works, but it changes the vibe from "classic bakery" to "summer picnic." Just make sure the graham crust is firmly pressed and baked briefly so it doesn't crumble when you slice the pie.
For another creamy treat, you might enjoy the richness of an Authentic Butter Chicken for dinner before serving this pie for dessert.
Adjusting the Batch Size
Scaling a custard pie isn't as simple as doubling the numbers, especially when it comes to the bake time and pan size.
Scaling Down (Half Batch) If you only have a 6 inch pan, halve all ingredients. Since you're using half an egg yolk, beat one yolk in a small bowl and measure out about 1 tablespoon. Reduce the blind bake time for the crust by about 20%, as smaller shells cook faster.
Scaling Up (Double Batch) For two 9 inch pies, double the ingredients. However, when cooking the custard, use a larger pot. The heat distribution changes in a larger volume, so it may take 10-12 minutes instead of 5-7 to reach the bubble point.
Don't increase the salt or vanilla by a full 2x start at 1.5x and taste it first.
Baking Adjustments If you're baking two crusts at once, lower the oven temperature to 350°F (175°C) and extend the time by 5-10 minutes. This ensures both crusts brown evenly without the top one burning before the bottom one is set.
Truths About Coconut Pies
There are a few common myths in the baking world that I want to clear up before you start your barefoot contessa coconut cream pie.
Myth: You must use coconut milk for "authentic" flavor. Actually, the combination of whole milk and toasted shredded coconut provides a more balanced, creamy taste. Coconut milk can sometimes overpower the delicate vanilla and butter notes.
Myth: Adding more cornstarch makes the pie "sturdier." Too much cornstarch creates a rubbery, "gelatin like" texture that feels artificial. The goal is a velvety custard, not a bounce back jelly. Stick to the measurements for that professional mouthfeel.
Storage and Freezer Tips
Custard pies are fragile, so storage is everything. Once you've added the whipped cream, the clock starts ticking.
Fridge Storage Keep your pie in the refrigerator, covered loosely with plastic wrap. It will stay fresh for about 3-4 days. However, the crust will slowly absorb moisture from the custard.
To prevent this, you can brush the inside of the baked crust with a thin layer of melted white chocolate or butter before filling.
Freezing Guidelines I don't recommend freezing the finished pie with the whipped cream, as the cream will deflate and separate. However, you can freeze the baked crust for up to 3 months. Wrap it tightly in foil and freezer bags. Thaw it in the fridge overnight before adding your filling.
Zero Waste Tips Don't throw away those leftover egg whites! You can use them to make a light meringue or a healthy omelet the next morning. If you have extra toasted coconut, store it in an airtight jar in the freezer; it keeps the oils from going rancid and is great on morning oatmeal.
Serving the Final Slice
To get those clean, bakery style slices, use a sharp knife dipped in hot water and wiped dry between every single cut. This prevents the whipped cream from smearing into the custard.
For a bit of flair, serve each slice with a small sprig of fresh mint or a few fresh raspberries. The tartness of the berries cuts through the richness of the coconut. If you're feeling extra, a tiny pinch of flaky sea salt on top of the whipped cream enhances the sweetness and makes the whole thing taste more sophisticated.
This barefoot contessa coconut cream pie is all about the contrast. The cold cream, the room temperature coconut, and the crisp pastry create a sensory experience that's hard to beat. Enjoy it slowly, and don't be afraid to go back for seconds.
Recipe FAQs
What is Obama's favorite coconut cream pie?
It is the Barefoot Contessa version. Former President Obama has famously praised Ina Garten's specific recipe for its perfect balance and texture.
What are common mistakes when baking coconut custard pie?
Under cooking the filling and over beating the cream. If the custard doesn't bubble, it won't set, and over whisking the heavy cream leads to a grainy, butter like consistency.
What's the difference between coconut cream pie and coconut custard pie?
There is virtually no difference. While "custard" specifically implies an egg-based cooked filling and "cream" is a broader category, both terms are used interchangeably for this dessert.
How do you keep a coconut cream pie from getting watery?
Brush the inside of the cooled crust with melted butter. This creates a thin moisture barrier that prevents the custard from soaking into the pastry.
Why is my coconut cream pie filling too runny?
The cornstarch didn't reach its gelatinization point. Ensure the mixture bubbles and thickens to a pudding like consistency before removing it from the heat. If you enjoyed mastering this creamy texture here, see how we achieve a similar richness in our homemade mac and cheese.
Why did my whipped cream turn into butter?
You overbeat the heavy whipping cream. Stop whisking immediately once stiff peaks form to prevent the fats from separating.
Can I freeze a finished coconut cream pie?
No, avoid freezing the finished pie. The whipped cream topping will deflate and separate upon thawing, ruining the texture and presentation.
Barefoot Contessa Coconut Cream Pie