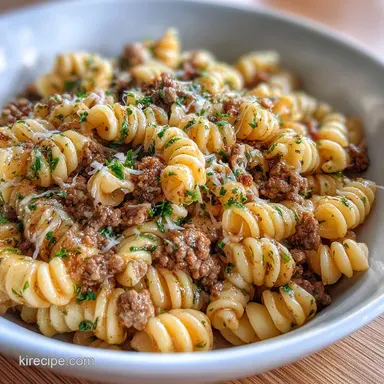
Beef Pasta No Tomato Garlic and Herbs in 30 Minutes

- Time: 10 min prep + 20 min cook
- Taste & Feel: Savory, garlic-centric, and silky
- Ideal for: Quick weekday meals and low-cost meal planning
The beef browns in the pan to a rich brown hue while the aroma of toasted garlic wafts through the air. It's the perfect Tuesday night meal, something that feels indulgent but requires neither a massive shopping trip nor an hour spent scrubbing dishes.
This substantial, savory dish trades the usual red sauce for a butter and herb emulsion. It satisfies those comfort food cravings while remaining lighter and cleaner.
This beef pasta no tomato garlic and herbs is all about balance. You'll find the salty punch of Parmesan, the brightness of fresh lemon, and the earthy notes of dried herbs. It's a rapid, uncomplicated method for serving a bold dinner.
How the Sauce Stays Glossy
- Starchy Water: Using a bit of the boiling pasta water creates a bridge between the fat from the beef and the pasta. This keeps the noodles from feeling dry and makes the cheese stick to the beef.
- The Hard Sear: Letting the beef sit undisturbed for a few minutes creates a brown crust. This adds a concentrated savory flavor that replaces the depth usually provided by a slow-simmered tomato sauce.
| Pasta Shape | Sauce Grip | Texture | Best For |
|---|---|---|---|
| Rotini | High | Springy | Maximum herb and beef cling |
| Penne | Medium | Chewy | Heartier, bite-sized chunks |
| Fusilli | High | Twisty | Trapping small bits of garlic |
Quick Recipe Specs
This dish is designed for speed and efficiency. With only 10 minutes of prep, it fits perfectly into a hectic schedule. The cooking process is streamlined to a single pot and one skillet, meaning you aren't managing a dozen different timers.
Because it uses lean beef and a simple emulsion, it stays light enough for a weekday but filling enough to keep everyone satisfied. It is a budget-friendly approach to a restaurant-style pasta.
Ingredients and Swaps
- 12 oz penne or rotini pasta
- 1 tbsp olive oil
- 1 tsp salt (for the pasta water)
- 1 lb lean ground beef (90/10 blend) Why this? Offers a great taste and fat balance without excess grease
- 2 tbsp unsalted butter Why this? Acts as the base for the garlic emulsion
- 4 cloves garlic, minced
- 1 medium yellow onion, finely diced
- 1 tsp dried oregano
- 1 tsp dried basil
- ½ tsp black pepper
- ½ tsp salt
- ½ cup grated Parmesan cheese Why this? Provides salt and thickens the sauce
- ¼ cup chopped fresh parsley
- ¼ cup reserved pasta water Why this? The starch helps bind the beef fat to the noodles
- 1 tbsp fresh lemon juice Why this? Lifts the heavy, rich fats
Substitution Options
| Original Ingredient | Substitute | Why It Works |
|---|---|---|
| Rotini | Rigatoni | Similar texture. Note: You might need a bit more pasta water |
| Parmesan | Pecorino Romano | Saltier and sharper profile. Note: Use less additional salt |
| Fresh Parsley | Fresh Spinach | Adds color and vitamins. Note: Wilt in the pan for 30 seconds |
Essential Kitchen Tools
You only need a few basics here. A large pot for the pasta is standard. For the beef, a wide stainless steel or cast iron skillet is the best choice. These materials hold heat better than non-stick pans, which helps you get that well-browned crust on the meat.
A sturdy spatula or a wooden spoon is necessary for breaking up the beef and tossing the pasta vigorously at the end. A small measuring cup is handy for scooping out the pasta water before you drain the pot.
From Prep to Plate
Phase 1: The Pasta Foundation
- Start by boiling a generous pot of salted water.
- Stir in the 12 oz pasta and cook until al dente, typically 1-2 minutes shy of the package instructions.
- Save ¼ cup (60ml) of the starchy pasta water before draining the noodles; set the pasta aside.

Phase 2: Creating the Umami Base
- Set a skillet over medium-high heat with 1 tbsp olive oil.
- Spread the 1 lb ground beef in an even layer, pressing down with a spatula, and let it sear for 3-4 minutes until a deep golden brown crust forms.

- Break the meat into small crumbles and cook until no longer pink and it reaches a safe internal temperature of 160°F/71°C.
- Reduce the heat to medium, move the beef to the edges of the pan, and melt 2 tbsp unsalted butter in the center.
- Once melted, add the diced yellow onion and sauté for 3 minutes until translucent.
Phase 3: Infusing the Garlic and Herbs
- Mix in the minced garlic, 1 tsp dried oregano, 1 tsp dried basil, ½ tsp salt, and ½ tsp black pepper; stir continuously for 60 seconds until fragrant.
Phase 4: The Final Emulsion
- Add the cooked pasta back into the skillet.
- Stir in the reserved pasta water and ½ cup grated Parmesan cheese.
- Toss everything vigorously over medium heat for 2 minutes until the water and cheese merge with the beef fats to create a glossy coating.

- Take the pan off the heat and fold in the chopped fresh parsley and 1 tbsp fresh lemon juice.
What Can Go Wrong
Fixing a Dry Texture
If the pasta looks matte or the beef seems to clump, the emulsion didn't quite hold. This usually happens if the pan was too hot or the pasta sat too long before being added. Add a tablespoon of water or a small piece of butter and toss again over low heat.
Stopping Burnt Garlic
Garlic burns quickly when the pan is screaming hot. If you see the garlic turning dark brown instead of golden, immediately add the pasta or a splash of water to drop the temperature.
Managing Excess Grease
If you used beef with a higher fat content, you might see oil pooling. Don't toss the pasta into a lake of grease. Use a spoon to remove all but a tablespoon of the fat before adding the butter.
| Problem | Root Cause | Solution |
|---|---|---|
| Pasta is clumpy | Not enough pasta water | Add 1-2 tbsp hot water and toss |
| Garlic tastes bitter | Overcooked/burnt garlic | Lower heat; add liquid to cool pan |
| Sauce is too oily | Beef fat not drained | Spoon out excess grease before adding butter |
Creative Twists and Swaps

If you want something even richer, you can stir in a spoonful of cream or use a garlic cream sauce as a base. This turns the dish into something more decadent, though you lose some of the clean, lemony finish.
For a garden heavy version, toss in a handful of baby spinach or frozen peas during the final two minutes of tossing. The residual heat wilts the greens without overcooking them.
If you're in the mood for a contrast, you could serve this alongside a sun-dried tomato sauce as a side dip for extra acidity.
| Beef Cut | Budget Level | Flavor Impact | Result |
|---|---|---|---|
| 90/10 Lean | Mid | Balanced | Clean, glossy finish |
| 80/20 Chuck | Low | Richer | Heavier, more savory, needs draining |
| Ground Turkey | Mid | Lighter | Milder flavor, needs more butter |
Keeping It Fresh
Store leftovers in an airtight container in the fridge. It stays good for up to 4 days.
When reheating, the pasta will have absorbed most of the moisture. To fix this, microwave on medium power or use a skillet over medium heat, stirring until the center reaches 165°F/74°C. Add a splash of water or beef broth to loosen the sauce and bring back that glossy texture.
I don't recommend freezing this dish. The pasta tends to break down and become mushy upon thawing, and the emulsion can separate, leaving the dish greasy.
Perfect Complements
This pasta is a complete meal on its own, but a simple side can balance the richness. I like serving it with a crisp arugula salad tossed in a basic lemon vinaigrette. The bitterness of the greens cuts through the butter and Parmesan.
Roasted broccoli or sautéed zucchini also work well. Since the pan is already hot, you can actually roast the veggies in the oven while the pasta boils to keep everything synchronized.
Frequently Asked Questions
Can I use pre-minced garlic?
You can use jarred minced garlic as a convenient substitute.
Tip: Add it slightly later than fresh garlic to prevent burning.
What if my sauce is too thin?
Toss the pasta over medium heat for another minute to reduce the liquid.
Tip: Stir in an extra tablespoon of Parmesan cheese to thicken the emulsion.
Would adding more protein work?
You can increase the amount of lean ground beef to make the dish heartier.
Tip: Ensure the meat is fully browned to maintain the deep golden brown crust flavor.
How do I store leftovers?
Keep the pasta in the refrigerator.
Tip: Add a splash of water before reheating to restore the glossy texture.
Is this beef pasta beginner-friendly?
This recipe uses basic pantry staples and a single pan for the sauce.
Tip: Prep all your vegetables and herbs before starting the beef sear.
Could this be made healthier?
Use a leaner beef blend or try a veggie-forward pepper sauce instead.
Tip: Increase the amount of fresh parsley for extra vitamins.
Why use reserved pasta water?
The starch helps the butter and cheese bind to the noodles.
Tip: Scoop the water out just before draining to ensure maximum starchiness.
Beef Pasta No Tomato Garlic and Herbs