Homesteader Canning Vegetable Soup Recipe
- Time: Active 45 minutes, Passive 1 hours 30 mins, Total 2 hours 15 mins
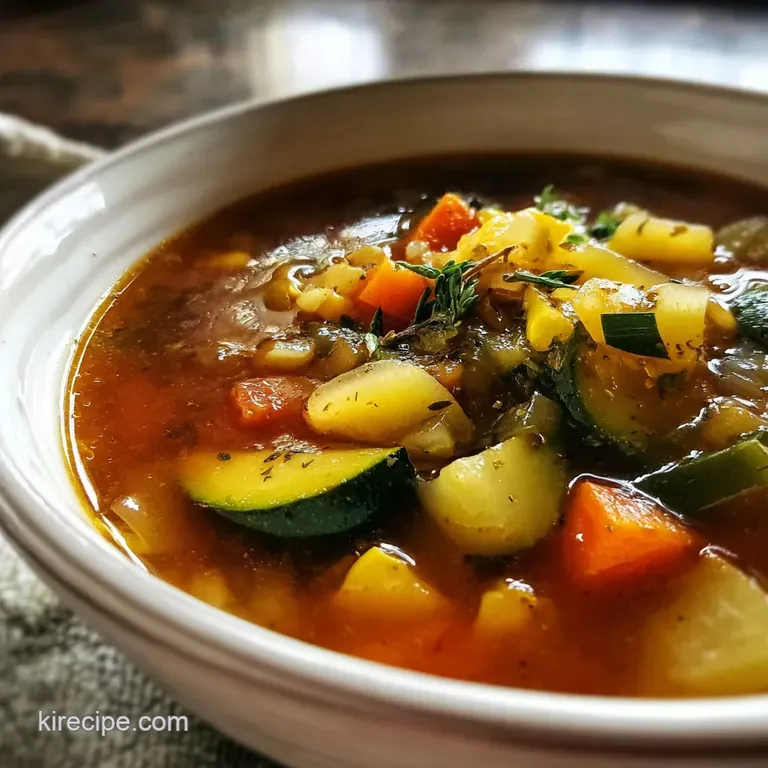
- Flavor/Texture Hook: Earthy, herb infused broth with tender, distinct vegetable bites.
- Perfect for: Winter food security, garden gluts, and busy weeknight prep.
- Master the Homesteader Canning Vegetable Soup Recipe
- Key Science Principles for Safety
- Component Analysis
- Yields and Processing Time Specs
- Essential Hardware for Home Canning
- Step by Step Prep Guide
- Fixing Common Canning Mistakes
- Smart Variations and Flavor Swaps
- Longevity and Shelf Life Secrets
- Serving Your Winter Soup Stash
- Myths About Home Canning
- Very High in Sodium
- Recipe FAQs
- 📝 Recipe Card
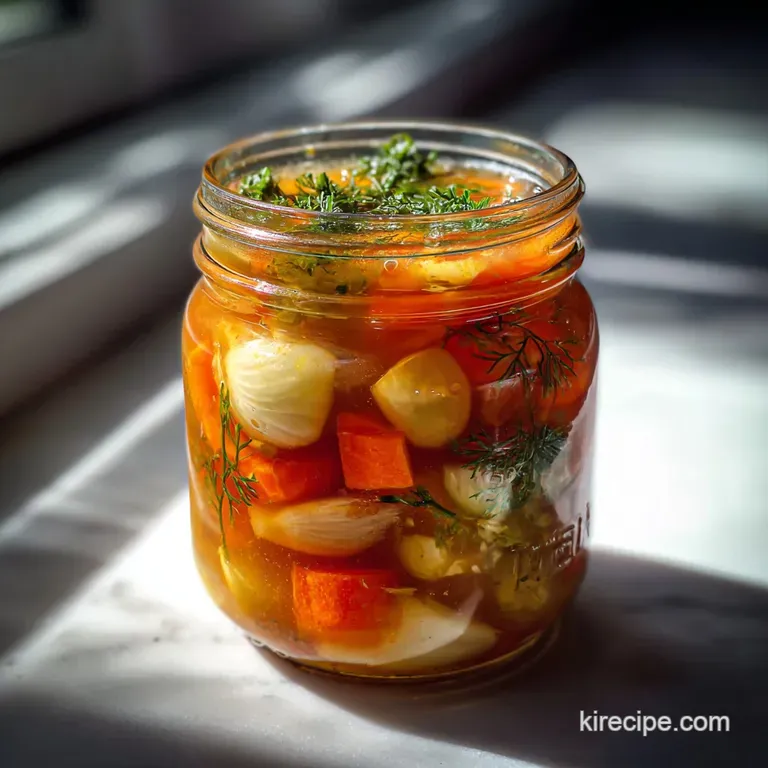
Master the Homesteader Canning Vegetable Soup Recipe
There is honestly nothing like the sound of seven glass jars pinging on the counter as they cool. It’s the ultimate "job well done" signal for any home cook. I remember the first time I tried canning vegetable soup for winter storage; I was so nervous about the pressure canner that I stood in the kitchen and stared at the gauge like it was a ticking time bomb.
But once that first jar popped, I was hooked.
The aroma that fills your kitchen while this simmers is incredible. We’re talking about the deep, savory scent of dried thyme and bay leaves mingling with the sweetness of onions and carrots. It’s the kind of smell that makes you want to grab a spoon before the soup even hits the jars.
You aren't just making dinner for tonight, you’re essentially "auditioning" your summer garden for a starring role in your winter pantry.
Trust me, when the snow is piling up and you’re too tired to even think about chopping a single onion, you will thank your past self for this stash. This specific homesteader vegetable soup recipe water bath canning methods won't cover - we are going full pressure canner for safety here.
It’s straightforward, budget friendly, and way better than anything you can buy in a tin. Let’s get into how we make this happen without any fuss.
Key Science Principles for Safety
Botulism Prevention: Low acid foods like potatoes and carrots require temperatures of 240°F to kill spores, which only a pressure canner can achieve.
Thermal Expansion: Leaving a 1 inch headspace allows the liquid to expand during the over high heat process without forcing the seal to fail.
Convection Heating: The thin broth allows heat to circulate quickly through the jar, ensuring the center of every vegetable cube reaches the safety threshold.
| Method | Time | Texture | Best For |
|---|---|---|---|
| Pressure Canning | 90 mins | Soft but intact | Long term shelf storage |
| Fresh Stovetop | 30 mins | Crisp tender | Immediate eating |
| Freezer Batch | 20 mins | Softer after thaw | Short term 3 month storage |
Choosing the right preservation method depends on your space. While freezing is fast, pressure canning vegetable soup homesteader style means you don't lose your harvest if the power goes out during a storm.
Component Analysis
| Ingredient | Science Role | Pro Secret |
|---|---|---|
| Potatoes (600g) | Starch Release | Use waxy varieties like Yukon Gold so they don't disintegrate into mush. |
| Onions (150g) | Flavor Base | Sauté them slightly before adding to the jar to unlock sulfur compounds. |
| Sea Salt (35g) | Preservation Aid | Always use canning or sea salt to avoid the anti caking agents that cloud broth. |
| Vegetable Stock | Heat Medium | Keep the stock hot when filling jars to prevent glass breakage from thermal shock. |
Every ingredient in this canned vegetable soup from garden harvest plays a part in the final balance. The salt isn't just for taste; it helps maintain the structure of the vegetables during the intense pressure of the canning cycle.
Yields and Processing Time Specs
To get the best pressure canner vegetable soup recipe results, you need to stick to the tested ratios. This recipe yields 7 quarts, which is a standard full load for most large canners.
- Potatoes: 4 cups (600g), peeled and cubed. Why this? Provides bulk and heartiness that makes the soup a full meal. (Sub: Parsnips)
- Carrots: 3 cups (450g), sliced into coins. Why this? Adds natural sweetness and bright color. (Sub: Winter squash)
- Corn kernels: 2 cups (300g). Why this? Gives a snappy texture contrast to the softer roots. (Sub: Hominy)
- Green beans: 2 cups (300g), 1 inch pieces. Why this? Holds its shape well under high pressure. (Sub: Asparagus)
- Shelled peas or lima beans: 2 cups (300g). Why this? Boosts the protein content significantly. (Sub: Edamame)
- Celery: 1 cup (150g), chopped. Why this? Essential aromatic for that classic "soup" flavor. (Sub: Celery seed)
- Onions: 1 cup (150g), diced. Why this? The foundation of savory depth. (Sub: Leeks)
- Low sodium stock: 3.5 quarts (3.3L). Why this? Controls the salt level while providing the liquid base. (Sub: Water with bouillon)
- Sea salt: 7 tsp (35g).
- Herbs: 1 tsp each dried thyme and oregano, 1/2 tsp peppercorns, 7 bay leaves.
If you find yourself running low on stock during the process, you can always supplement with a quick batch of my Substitute for Cream recipe if you're eating it fresh, though for canning, stick to clear liquids like broth or water.
Essential Hardware for Home Canning
You cannot use a water bath for this recipe; it’s simply not safe for low acid vegetables. You'll need a pressure canner (like a Presto or All American). Ensure your seal is in good shape and your vents are clear.
Besides the canner, grab a jar lifter, a wide mouth funnel, and a bubble remover tool. These might seem like "extras," but they prevent burns and ensure your seals are perfect every time. Clean, sterilized quart jars are a must - I always check the rims for any tiny nicks or cracks that might prevent a vacuum seal.
step-by-step Prep Guide
Preparing the Harvest
- Wash all vegetables thoroughly in cold water. Note: Removing dirt reduces the bacterial load before processing.
- Peel and cube the 600g of potatoes into 1/2 inch pieces.
- Slice the 450g of carrots into uniform coins until they look like bright orange buttons.
- Chop the onions, celery, and green beans into bite sized pieces.
Packing Your Jars
- Distribute the raw vegetables evenly among 7 sterilized quart jars.
- Add 1 teaspoon of sea salt and 1 bay leaf to each jar.
- Divide the thyme, oregano, and peppercorns equally across the jars.
- Pour the hot stock into each jar using a funnel until the liquid hits the 1 inch headspace mark.
- Remove air bubbles with a plastic spatula until no more pockets of air rise to the top.
- Wipe the jar rims with a damp cloth and screw on the lids to finger tight.
The Processing Cycle
- Place jars in the pressure canner with 2-3 inches of water.
- Process at 10 or 11 lbs of pressure (adjust for altitude) for 90 minutes.
- Let the pressure drop naturally until the vent lock clicks down.
Chef's Tip: Never rush the cooling process by dousing the canner in cold water; this causes "siphoning," where the liquid is sucked right out of your jars.
Fixing Common Canning Mistakes
Liquid Loss During Processing
This usually happens because of rapid temperature fluctuations. If you see the pressure jumping up and down, or if you vent the steam too quickly at the end, the liquid inside the jar will boil over and escape the seal.
Floating Vegetables Solution
If your veggies are all huddling at the top of the jar, they probably had too much air left in their tissues. Pre cooking them for 5 minutes (the "hot pack" method) instead of "raw packing" can help them sink, but it’s mostly an aesthetic issue and totally safe to eat.
| Problem | Root Cause | Solution |
|---|---|---|
| Cloudiness | Hard water or table salt | Use distilled water and canning salt |
| Lid didn't seal | Food on the rim | Wipe rims with white vinegar before capping |
| Soft vegetables | Over processing | Ensure pressure doesn't exceed recommended levels |
Common Mistakes Checklist
- ✓ Check jar rims for nicks (prevents seal failure).
- ✓ Exhaust the canner for 10 full minutes before putting the weight on.
- ✓ Don't use a towel to tighten lids - use your fingers only.
- ✓ Always let jars sit undisturbed for 24 hours after processing.
- ✓ Label your jars with the date (don't trust your memory!).
Smart Variations and Flavor Swaps
If you want to change things up, you can easily turn this into a "zesty" version by adding a half teaspoon of red pepper flakes to each jar. It gives a gentle heat that wakes up the palate.
Adding Meat Options
If you want a heartier meal, you can add 1 pound of browned ground beef or cubed cooked chicken to the vegetable mix. However, you must ensure you are following the meat processing times (usually still 90 minutes for quarts). For a quick meal, I often serve this soup with a Pillsbury Crescent Roll recipe on the side.
| Original Ingredient | Substitute | Why It Works |
|---|---|---|
| Potatoes | Turnips | Lower carb, holds shape well. Note: Slightly more bitter flavor. |
| Vegetable Stock | Chicken Broth | Richer flavor. Note: Adds animal fat; ensure jars are wiped clean. |
| Green Beans | Wax Beans | Same texture. Note: Provides a different color profile. |
Longevity and Shelf Life Secrets
Store your processed jars in a cool, dark, and dry place like a basement or a pantry away from the oven. Light and heat are the enemies of preserved food; they can break down the vitamins and cause the colors to fade over time.
Properly canned homesteader vegetable soup will stay safe and high-quality for at least 12 months.
Don't throw away your vegetable scraps from the prep phase! Onion skins, carrot tops, and celery ends can be tossed into a freezer bag. Once you have a full gallon bag, simmer them with water to make a "zero waste" stock for your next batch of homemade canned vegetable soup homestead recipe.
It’s the ultimate homesteader move.
Serving Your Winter Soup Stash
When you're ready to eat, just pop the lid and pour the contents into a saucepan. Since the vegetables are already fully cooked, you only need to bring it to a simmer. I love adding a handful of fresh parsley or a squeeze of lemon juice at the very end to brighten the flavors back up after their long sleep in the jar.
The Sourdough Pairing
Nothing beats a thick slice of crusty sourdough bread dipped into this broth. The acidity of the bread cuts through the earthy root vegetables perfectly. If the soup feels too thin for your liking, you can mash a few of the potatoes against the side of the pot to naturally thicken the liquid without needing flour.
The Quick Fix Garnish
For a little extra "velvety" texture, stir in a dollop of sour cream or a sprinkle of sharp cheddar cheese just before serving. It transforms the simple garden soup into something that feels indulgent and heavy duty for those cold nights. Check out my Creamy Potato and recipe if you want a version that starts with meat and cheese from the get go!
Myths About Home Canning
One big misconception is that you can "open kettle" can soup by just putting hot soup in jars and letting them seal. This is incredibly dangerous for vegetables as it doesn't reach the temperatures needed to kill shelf stable bacteria. Always use the pressure canner guide.
Another myth is that you can't use frozen vegetables in your canning. You actually can! If your garden harvest was too big to handle all at once, you can freeze the corn or peas and then use them in this canning vegetable soup for winter storage later in the season.
Just be aware that frozen then canned veggies might be slightly softer than fresh then canned ones.

Very High in Sodium
2580 mg mg of sodium per serving (112% % of daily value)
The American Heart Association recommends limiting sodium intake to about 2,300mg per day for most adults. This recipe significantly exceeds that limit.
Tips to Reduce Sodium in Your Vegetable Soup
-
Low-Sodium Broth-30%
Switch to a no-salt added or very low-sodium broth. This single change can dramatically lower the sodium content of the soup. Ensure to check nutrition labels for verification.
-
Reduce Salt-25%
Drastically reduce or eliminate the added sea salt. Start by using half the amount (3.5 tsp instead of 7 tsp) and taste the soup before adding any more. Salt can always be added, but not easily removed.
-
Fresh Herbs-10%
Substitute some of the dried thyme and oregano with fresh herbs. Fresh herbs provide a brighter flavor without adding sodium. Consider using a blend of fresh thyme, oregano, and parsley.
-
Omit Bay Leaves-5%
Consider reducing the number of bay leaves used from 7 to 3. While bay leaves do not contain sodium, removing them can help to simplify the flavor profile and allow other herbs to shine.
-
Spice it Up!
Enhance the flavor with sodium free spices and herbs instead of salt. Experiment with garlic powder, onion powder, black pepper, red pepper flakes or other flavorful blends to boost taste.
Recipe FAQs
Does vegetable soup have to be pressure canned?
Yes, absolutely. Vegetable soup contains low-acid ingredients like carrots and potatoes, requiring temperatures above boiling point to eliminate botulism spores safely.
What gives vegetable soup that depth of flavor when canned?
A slow, aromatic base sauté and the correct herbs. Take the time to lightly sauté your onions and celery before jarring them to deepen their flavor profile; this principle of building flavor layers applies across many slow cooked dishes, much like in our Chicken Long Rice Recipe.
What not to put in vegetable soup destined for canning?
Never add pasta, flour/starches, rice, or thickeners. These ingredients break down too much during the 90-minute processing time, creating excessively thick products that prevent heat circulation and can lead to unsafe processing.
What vegetables should not be pressure canned safely?
Do not can pumpkin, squash, or sweet potatoes mashed or pureed. While cubed, firm squash is acceptable, pureed versions become too dense, requiring specialized instructions; for quick meals, consider cooking those separately, perhaps using our Arbys Beef and recipe sauce method instead.
How do I prevent my vegetables from floating to the top after processing?
Use the hot pack method instead of raw packing. Briefly simmer the chopped vegetables in water or broth for 3 to 5 minutes before filling the jars; this softens the cellular structure slightly, allowing them to stay submerged better.
Is it true I can use a water bath canner if I use extra salt?
No, this is a common misconception. Salt only affects taste and preservation slightly; it does not raise the boiling point high enough (212°F) to safely destroy Clostridium botulinum spores found in low-acid foods, which requires the 240°F achieved only in a pressure canner.
How should I prepare jars filled with raw vegetables for processing?
Wipe the rims clean and leave exactly one inch of headspace. After adding hot liquid and using a bubble remover tool to eliminate trapped air, wipe the jar lip completely free of grease or liquid before applying the clean, new lids fingertip tight.
Homesteader Canning Vegetable Soup

Ingredients:
Instructions:
Nutrition Facts:
| Calories | 209 kcal |
|---|---|
| Protein | 8.7 g |
| Fat | 1.6 g |
| Carbs | 43.2 g |
| Fiber | 9.3 g |
| Sugar | 6.8 g |
| Sodium | 2580 mg |
