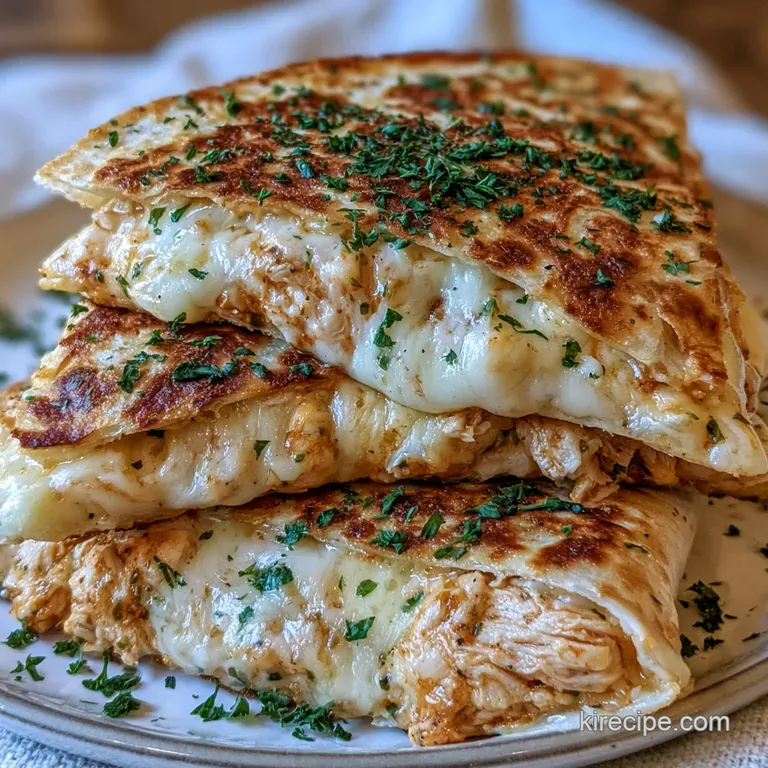
Healthy Chicken Quesadillas: Golden and Crispy
- Time:10 minutes prep + 20 minutes cook = 30 minutes total
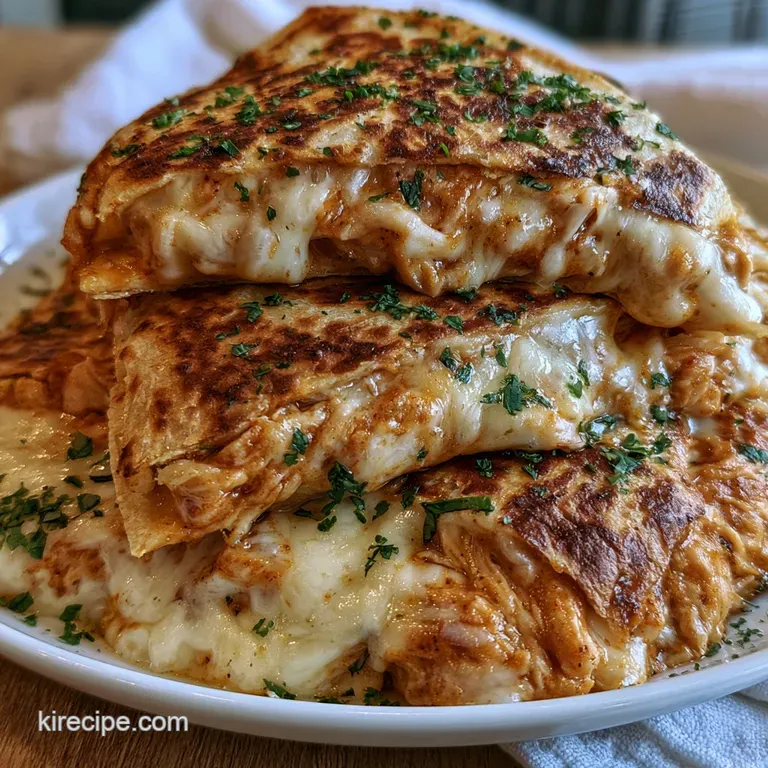
- Flavor/Texture Hook: Golden brown shatter and velvety melted cheese
- Perfect for: Busy weeknight dinners or beginner friendly meal prep
That first loud sizzle when the tortilla hits the hot oil is where the magic starts. I remember one rainy Tuesday when the kids were melting down and I had exactly thirty minutes to get dinner on the table before total chaos took over.
I grabbed some leftover chicken and a handful of cheese, and for the first time, I didn't rush the browning process.
The smell of smoked paprika and cumin filling the kitchen usually calms everyone down. Once that cheese starts to bubble and the edges of the tortilla turn a deep gold, the mood in the house shifts.
We've all had those versions that are just mushy bread and lukewarm cheese, but these Chicken Quesadillas are built to stay crispy.
Chicken Quesadillas
Right then, let's get into why this version actually works. Most people just throw everything in a tortilla and hope for the best, but we're going to be a bit more strategic about the heat and the moisture.
The secret is all in the "dry sear." If you put wet chicken in a pan, it steams. Steamed chicken is gray and bland. By patting the meat dry and searing it over medium high heat, we get those brown, flavor packed edges that make the filling stand out.
But what about the sogginess? We'll get to that. It's all about the cheese placement and the temperature of your pan.
Logic Behind The Crisp
- Surface Moisture: Patting chicken dry prevents it from steaming, allowing it to brown quickly.
- Cheese Buffer: Putting cheese on the bottom and top of the filling creates a seal that keeps juices from soaking the bread.
- Medium Heat: A steady temperature ensures the cheese melts fully before the tortilla burns.
- Dry-Sauté: Cooking the onions and peppers with the chicken juices adds a deeper, savory layer.
| Method | Time | Texture | Best For |
|---|---|---|---|
| Stovetop | 20 mins | Shatter crisp | Small batches |
| Oven | 15 mins | Evenly toasted | Feeding a crowd |
| Griddle | 15 mins | Uniform brown | High volume |
The choice between the stove and the oven usually comes down to how many people you're feeding. For just a few, the stovetop gives you that direct control over the crunch.
Component Analysis
| Ingredient | Science Role | Pro Secret |
|---|---|---|
| Monterey Jack | Meltability | Use a block and grate it yourself for a smoother melt |
| Smoked Paprika | Depth | Adds a "grilled" flavor even if you're using a skillet |
| Whole Wheat Tortilla | Structure | Holds up better under heavy fillings than flour |
| Olive Oil | Heat Transfer | Ensures the chicken doesn't stick while browning |
I've found that pre shredded cheese often has potato starch to stop it from clumping in the bag, but that same starch stops it from melting into a velvety pool. It's a small detail, but it's the difference between a good meal and a great one.
Shopping List Breakdown
- 1 lb boneless skinless chicken breast, cut into 1/2 inch cubes Why this? Lean meat that cooks fast and absorbs spices
- 1 tbsp olive oil Why this? High smoke point for searing
- 1 tsp chili powder Why this? Base earthy flavor
- 1/2 tsp cumin Why this? Traditional Mexican aroma
- 1/2 tsp garlic powder Why this? Consistent flavor throughout the meat
- 1/4 tsp smoked paprika Why this? Adds a hint of wood fire taste
- salt to taste Why this? Basic flavor enhancer
- black pepper to taste Why this? Adds a subtle bite
- 4 medium whole wheat tortillas (8 inches) Why this? Nutty flavor and better stability
- 2 cups reduced fat Monterey Jack cheese, shredded Why this? Excellent melt to flavor ratio
- 1 medium bell pepper, thinly sliced Why this? Adds sweetness and color
- 1/4 cup yellow onion, finely diced Why this? Pungent base for the sauté
Chef's Note: If you're feeling bold, add a pinch of cinnamon to your chicken seasoning. It doesn't make it taste like dessert, but it adds a mysterious warmth that makes people ask, "What is in this?"
Key Steps
- Pat the cubed chicken dry with paper towels. In a small bowl, toss the chicken with chili powder, cumin, garlic powder, smoked paprika, salt, and black pepper until evenly coated. Note: Dry chicken browns faster.
- Heat olive oil in a large non stick or cast iron skillet over medium high heat. Add the chicken and cook 5-7 mins until edges are browned and the center is no longer pink.
- Add the sliced bell peppers and diced onions to the skillet with the chicken. Sauté 3-4 mins until the vegetables are tender crisp and fragrant. Remove the mixture from the pan and set aside.
- Wipe the skillet clean. Place one tortilla in the pan over medium heat and sprinkle a thin layer of shredded cheese across the entire surface.
- Spread half of the chicken and vegetable mixture over one half of the tortilla. Note: Keep the filling thin to avoid leaks.
- Wait 1-2 mins until the cheese begins to bubble, then fold the tortilla in half.
- Press down firmly with a spatula 2 mins until the exterior is golden brown and the cheese is fully melted.
- Repeat for remaining tortillas.
Common Mistakes & Troubleshooting
Getting the texture right on Chicken Quesadillas can be tricky if you're not watching the heat. The most common issue I see is the "soggy middle," which usually happens because the vegetables released too much water or the pan wasn't hot enough to sear the tortilla quickly.
| Issue | Solution |
|---|---|
| Why Your Tortilla Is Soggy | This usually happens if you overfill the tortilla or if the chicken was too wet when it hit the pan. When moisture gets trapped between the cheese and the bread, it steams the tortilla from the inside |
| Why Your Cheese Leaks | If you use too much filling or don't press down firmly, the cheese will push out the sides. This creates those burnt cheese "skirts" which some people love, but if they're too aggressive, they taste b |
| Why The Center Is Cold | This is a classic case of heat being too high. The outside looks golden, but the heat never penetrated the filling. Lower your flame slightly and give it an extra minute. |
Common Mistakes Checklist
- ✓ Avoid using pre shredded cheese to ensure a better melt.
- ✓ Never crowd the pan with too many tortillas at once.
- ✓ Pat the chicken dry before seasoning to avoid steaming.
- ✓ Wipe the pan between sautéing and toasting for a cleaner crust.
- ✓ Don't flip the tortilla too early; wait for the cheese to bubble.
Adjustment Guidelines
If you're making these for a party, you'll need to scale up. For a 2x batch, I recommend working in batches of two. If you try to cram four tortillas into one pan, you'll drop the temperature and lose that shatter crisp texture.
For those cooking for one, just halve the chicken and veg. Since you're using smaller amounts, reduce the cook time for the chicken by about 20% to prevent it from drying out.
If you're baking these in the oven for a crowd, lower your temperature to 180°C and extend the time. This prevents the edges from burning before the cheese in the center is fully melted.
| Goal | Action | Result |
|---|---|---|
| Extra Crunch | Use clarified butter | Higher smoke point and nuttier flavor |
| Lighter Version | Use corn tortillas | gluten-free and more traditional |
| Spicy Kick | Add diced jalapeños | Sharp heat that cuts through the cheese |
For a more complex flavor, you might want to try a Chipotle sauce recipe as a dip. The smokiness of the sauce pairs perfectly with the cumin in the chicken.
Dispelling Kitchen Myths
One big myth is that you need to sear the vegetables separately from the chicken. Honestly, don't even bother. Cooking the peppers and onions in the leftover chicken fat and spices creates a much more integrated flavor.
Another common misconception is that more oil equals more crisp. Too much oil actually makes the tortilla greasy and heavy. A thin film of oil or a small pat of butter is all you need for that golden finish.
Finally,, some people think you should use a heavy lid to melt the cheese. While it works, it traps steam, which is the enemy of a crispy tortilla. Trust the medium heat and the fold.
Storage Guidelines
If you have leftovers, store them in an airtight container in the fridge for up to 3 days. Avoid stacking them directly on top of each other without parchment paper, or they'll stick together.
For the freezer, wrap each individual piece in foil and place them in a freezer bag for up to 2 months. When you're ready to eat, don't use the microwave it makes them rubbery. Instead, toss them back into a dry skillet over medium heat for 3-4 minutes per side.
To avoid waste, take any leftover bell peppers and onions and toss them into an omelet the next morning. The residual spices from the chicken seasoning make for a great breakfast base.
Serving Suggestions
The key to a great plate is balance. Since these Chicken Quesadillas are rich and cheesy, you need something bright and acidic to cut through the fat. A side of fresh pico de gallo or a squeeze of lime juice is essential.
If you want to go all out, serve them with a side of sliced avocado and a dollop of Greek yogurt or sour cream. If you're in the mood for something even more indulgent, you could take a page from the homemade Crunchwrap and add a layer of seasoned beef or beans to the side.
I usually serve mine with a simple cabbage slaw tossed in apple cider vinegar. The crunch of the raw cabbage against the velvety cheese is a total win. Keep it simple, keep it fresh, and enjoy that golden brown crunch!
High in Sodium
1120 mg 1120 mg of sodium per serving (49% 49% of daily value)
The American Heart Association recommends a daily sodium limit of no more than 2,300 mg, with an ideal limit of 1,500 mg for most adults.
Tips to Reduce Sodium
-
Eliminate Added Salt-25%
Remove the 'salt to taste' entirely; the spices and cheese already provide significant flavor.
-
Switch Your Tortillas-20%
Replace whole wheat tortillas with low-sodium corn tortillas or lettuce wraps to lower processed sodium.
-
Moderate the Cheese-15%
Use half the amount of Monterey Jack cheese or substitute with a low-sodium Swiss cheese.
-
Audit Your Spices-10%
Ensure your chili powder and garlic powder are salt free blends rather than seasoned mixes.
-
Enhance with Acidity
Add fresh lime juice or cilantro at the end to brighten the flavor without adding any salt.
Recipe FAQs
What ingredients go in a chicken quesadilla?
Chicken breast, Monterey Jack cheese, and whole wheat tortillas. The filling is flavored with olive oil, chili powder, cumin, garlic powder, smoked paprika, salt, pepper, bell pepper, and yellow onion.
Do I cook the chicken before placing in quesadillas?
Yes, cook it first. Sauté the seasoned chicken in olive oil over medium high heat until the edges are browned and the center is no longer pink. If you enjoyed mastering the sear on the chicken here, see how the same principle works in our butter chicken recipe.
How to prevent the tortillas from becoming soggy?
Pat the chicken dry with paper towels before seasoning. Avoid overfilling the tortilla and keep the skillet heat consistent to ensure the exterior sears quickly before moisture can steam the bread.
What is the easiest way to make a quesadilla?
Place a tortilla in a medium heat skillet and sprinkle cheese across the surface. Spread the cooked chicken and vegetable mixture over one half, fold it over, and press firmly with a spatula until golden brown.
Can diabetics eat quesadillas?
Yes, with modifications. Using whole wheat tortillas provides more fiber than white flour options, though monitoring portion sizes and increasing the vegetable ratio helps manage glycemic impact.
How to reheat leftover quesadillas without them getting rubbery?
Toss them back into a dry skillet over medium heat. Heat for 3-4 minutes per side to restore the crisp texture, as microwave reheating often makes the tortilla rubbery.
Is it true that you should use high heat to melt the cheese quickly?
No, this is a common misconception. Medium heat is necessary to ensure the cheese bubbles and melts fully without burning the outer surface of the tortilla.
Homemade Chicken Quesadillas

