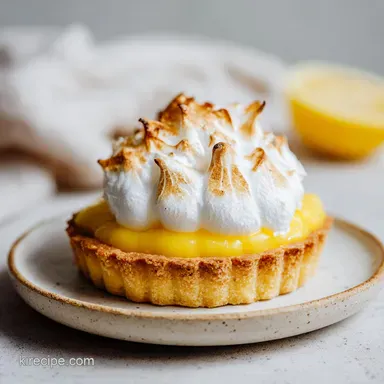
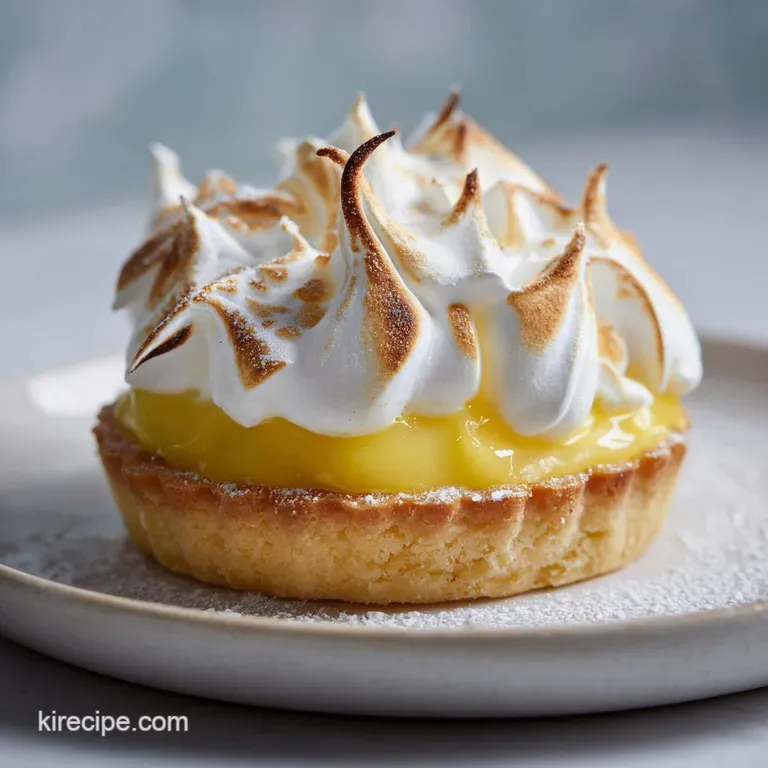
Lemon Meringue Pie: Failure-Proof and Velvety
- Time:30 minutes active + 3 hours chilling = Total 4 hours
- Flavor/Texture Hook: Shattering buttery crust, velvety tart curd, and toasted mahogany peaks
- Perfect for: Spring brunch or a show stopping dinner party dessert
- Getting Your Lemon Meringue Pie Recipe Just Right
- Why the Texture and Flavor Actually Work
- The Precise Elements for a Zesty Balance
- The Essential Tools for Baking Success
- Step-by-Step Guide to the Perfect Bake
- Fixing Common Meringue and Filling Glitches
- Troubleshooting Common Issues
- Adjusting Your Batch Size
- Debunking Baking Myths
- Keeping Your Slices Fresh and Zero Waste
- The Best Sips and Sides to Match
- Recipe FAQs
- 📝 Recipe Card
Getting Your Lemon Meringue Pie Recipe Just Right
That smell of toasted sugar and sharp, zesty citrus hitting the air is honestly one of my favorite things in the world. There is something about the way the lemon cuts through the sweetness of the meringue that just works.
But for the longest time, I believed the myth that you need a professional blowtorch or a fancy pastry kitchen to get those towering, golden peaks. I used to think that "weeping" meringue - that annoying layer of syrup that leaks out - was just an inevitable part of the process.
Trust me, it isn't. I spent a few years treating this pie like a guessing game, only to realize that baking is more about precision than luck. Once I stopped treating the meringue as an afterthought and started treating it as a structural element, everything changed.
This isn't about being a "pro" chef, it's about understanding how the heat interacts with the sugar and eggs.
In this lemon meringue pie recipe, we are focusing on the physics of the bake. We're going to make sure the crust is actually flaky, not tough, and that the filling is thick enough to hold a slice without sliding.
We've got a bit of work to do with the chilling time, but the result is a velvety, tart experience that'll make your friends think you've been taking secret classes. Let's crack on.
Why the Texture and Flavor Actually Work
To get a pie that doesn't collapse, you have to understand a few basic rules of the kitchen. It's not magic, just a few specific reactions.
The Hot Cold Bridge: Pouring meringue onto a boiling hot filling cooks the bottom of the meringue instantly. This creates a structural bond that prevents the meringue from sliding off the curd.
Sugar Stabilization: Adding sugar slowly to egg whites doesn't just sweeten them, it creates a stable network of air bubbles. This is why the peaks stay stiff instead of collapsing back into a liquid.
Starch Binding: Cornstarch needs to reach a full boil to "activate." If you don't let the lemon filling bubble, the starch won't bind the liquid, and you'll end up with a lemon soup instead of a pie.
Fat Integration: Adding butter at the very end of the filling process gives it that velvety mouthfeel. If you boiled the butter too long, it would separate, leaving you with oily streaks.
| Method | Time | Texture | Best For |
|---|---|---|---|
| Classic Scratch | 4 hours | Shattering crust, fluffy peaks | Special occasions, maximum flavor |
| Quick Shortcut | 2 hours | Graham crust, softer filling | Weeknight cravings, low effort |
The Precise Elements for a Zesty Balance
When you're working with a lemon meringue pie recipe, the quality of your fat and the temperature of your liquids are everything. Don't even bother with low-fat butter here, it won't give you the structural integrity the crust needs.
Component Analysis
| Ingredient | Science Role | Pro Secret |
|---|---|---|
| Cold Butter | Creates steam pockets | Keep it in the fridge until the second you need it |
| Cornstarch | Thickening agent | Whisk it with sugar first to avoid clumps |
| Cream of Tartar | Protein stabilizer | Essential for preventing the meringue from collapsing |
| Lemon Zest | Concentrated oils | Rub zest into the sugar to release more flavor |
Ingredients & Substitutes
For the Crust:
- 1 ¼ cups (150g) all purpose flourWhy this? Provides the necessary gluten structure for a flaky base
- ½ tsp (3g) saltWhy this? Balances the richness of the butter
- ½ cup (113g) cold unsalted butter, cubedWhy this? Cold fat creates the "shatter" effect
- 3 4 tbsp (45 60ml) ice waterWhy this? Binds dough without melting the butter
- Substitute: Use chilled coconut oil for a dairy-free option (Note: Crust will be more crumbly)
For the Filling:
- 1 cup (200g) granulated sugar
- 3 tbsp (25g) cornstarch
- ¼ tsp (1.5g) salt
- 1 ½ cups (355ml) water
- ½ cup (120ml) fresh lemon juiceWhy this? Bottled juice lacks the bright, fresh acidity
- 1 tbsp (6g) lemon zest
- 3 large egg yolks, beatenWhy this? Provides the velvety thickness and yellow color
- 2 tbsp (28g) unsalted butter
- Substitute: Lime juice for a different citrus profile (Note: Result is more "tropical")
For the Meringue:
- 3 large egg whites, room temperatureWhy this? Room temp whites whip to a larger volume
- ¼ tsp (1g) cream of tartarWhy this? Lowers pH to stabilize the egg proteins
- ½ cup (100g) granulated sugar
- Substitute: Aquafaba (chickpea brine) for a vegan meringue (Note: Less stable, requires more whipping)
The Essential Tools for Baking Success
You don't need a professional kitchen, but a few specific tools make this a lot easier. If you're using a hand mixer, just be prepared for a slightly longer whipping time than a stand mixer like KitchenAid.
- 9 inch Pie Dish: Glass or ceramic works best for even heat distribution.
- Medium Saucepan: Something with a heavy bottom to prevent the lemon curd from scorching.
- Whisk: A balloon whisk is best for getting the lumps out of the cornstarch.
- Electric Mixer: Essential for the meringue; doing this by hand is a workout I wouldn't wish on anyone.
- Rolling Pin: For getting that crust thin and even.
- Offset Spatula: This is the secret to getting the meringue spread perfectly to the edges of the crust.
Step-by-step Guide to the Perfect Bake
Right then, let's get into the actual process. I've broken this down into phases so you don't feel overwhelmed. Just remember the numeric checkpoints: the crust needs to be pale gold, the filling must be glossy, and the peaks should be mahogany.
Phase 1: The Shattering Crust
- Combine flour and salt in a bowl. Cut in the cold, cubed butter using a pastry cutter or two forks until pea sized crumbs form. Note: Don't overwork it, or the crust will be tough
- Stir in ice water one tablespoon at a time until the dough just holds together.
- Roll out the dough on a floured surface and fit it into your 9 inch pie dish. Prick the bottom with a fork to prevent air bubbles.
- Bake at 375°F (190°C) for 12–15 minutes until the edges are pale gold. Let it cool slightly while you make the filling.
Phase 2: The Velvety Filling
- In your saucepan, whisk together the sugar, cornstarch, and salt. Stir in the water, fresh lemon juice, and zest.
- Bring the mixture to a boil over medium high heat, stirring constantly. Slowly whisk in the beaten egg yolks to temper them so they don't scramble.
- Continue boiling for 1 minute until the mixture is thick, glossy, and bubbles heavily. Remove from heat and stir in the butter until completely melted.
Phase 3: The Cloud Like Meringue
- Beat the room temperature egg whites and cream of tartar on medium speed until soft peaks form (the peaks should curl over when you lift the whisk).
- Gradually add the sugar, one tablespoon at a time, while increasing speed to high. Beat until stiff, glossy peaks form that stand straight up.
Phase 4: Assembly and Toasting
- Pour the hot lemon filling into the pre baked crust. Immediately mound the meringue on top, spreading it all the way to the edges of the crust. Note: Sealing the edges prevents the meringue from shrinking
- Use your spatula to create decorative swirls and peaks. Bake at 325°F (160°C) for 20 minutes until the peaks are mahogany.
- Chill for 3 hours before slicing. This is non negotiable if you want clean slices.
Fixing Common Meringue and Filling Glitches

Even with a precise lemon meringue pie recipe, things can go sideways. Usually, it's a temperature issue or a timing error. If your meringue looks like it's sweating, don't panic, it's a common fix.
Troubleshooting Common Issues
| Issue | Solution |
|---|---|
| Why Your Meringue Is Weeping | Weeping happens when the sugar doesn't fully dissolve or the meringue is underbaked. This creates a layer of syrup between the filling and the foam. Ensure you add sugar slowly and that you spread the |
| Why Your Filling Is Runny | If the filling doesn't set, it's almost always because it didn't reach a full boil. The cornstarch needs that specific temperature to gelatinize. If you didn't see those big, glossy bubbles, the starc |
| Why Your Crust Is Soggy | A "soggy bottom" occurs when the filling moisture seeps into the crust. Blind baking (pre baking) is the solution here. Making sure the crust is baked until pale gold creates a barrier that keeps the |
Adjusting Your Batch Size
Sometimes you don't need 8 slices, or maybe you're feeding a crowd. Scaling a lemon meringue pie recipe requires a bit of math, especially with the eggs.
Scaling Down (Half Batch): If you're using a smaller 6 inch pan, halve all ingredients. Since you can't easily halve an egg, beat one egg in a small bowl and use half of the liquid by weight. Reduce the crust baking time by about 20%, but keep the filling boil time the same.
Scaling Up (Double Batch): When making two pies, work in batches for the meringue. If you whip too many egg whites at once in a standard mixer, the bottom doesn't get as much air as the top.
For the filling, you can double the batch in one large pot, but be careful - it will take longer to reach a boil, so keep stirring to avoid scorching the bottom.
Debunking Baking Myths
There are a lot of "old wives' tales" in the baking world. Let's clear a few up so you can focus on the actual technique.
The Blowtorch Myth: Many believe you need a torch for a professional look. Actually, a 325°F oven provides a more even toast and helps set the meringue structure better than a surface level torch.
The "Room Temperature" Rule: People say everything must be room temp. While true for egg whites (for volume), it's the opposite for crust. If your butter is room temp, you lose the steam pockets, and your crust becomes a cookie instead of a flaky pastry.
Keeping Your Slices Fresh and Zero Waste
A lemon meringue pie recipe is a labor of love, so you want it to last. However, meringue is temperamental because it's essentially a sugar foam.
Storage Guidelines: Store your pie in the refrigerator. Because of the egg based filling and meringue, it must stay chilled. It will stay fresh for about 3-4 days. I recommend covering it loosely with plastic wrap, but be careful not to let the wrap touch the peaks, or you'll flatten your hard work.
Freezing: Honestly, I don't recommend freezing the whole pie. The meringue can become grainy and weepy upon thawing. However, you can freeze the pre baked crust for up to 2 months. Just wrap it tightly in foil and bake it for an extra 5 minutes before adding the filling.
Zero Waste Tips: Don't throw away those lemon peels! After zesting, you can still juice the lemons. If you have leftover lemon peels, simmer them with sugar and water to make a simple syrup for cocktails or a Lemon Beurre Blanc Sauce for fish. If you have a few egg whites left over, they can be frozen in an ice cube tray for future batches of macarons or pavlova.
The Best Sips and Sides to Match
Because this pie is so intensely tart and sweet, you want pairings that either complement the citrus or provide a neutral balance.
Drink Pairings: A crisp, cold glass of Prosecco or a dry Champagne cuts through the richness of the butter and sugar perfectly. If you're looking for something non alcoholic, a chilled hibiscus tea provides a floral note that plays well with the lemon. For a party vibe, a fruity Peach Sangria offers a sweet contrast to the pie's acidity.
Dessert Platter Ideas: If you're serving this as part of a larger spread, pair it with something contrasting in texture. A few fresh raspberries or a side of whipped cream can soften the tartness. For another treat on the table, something like a Peaches and Cream Cake provides a creamy, mellow alternative to the zesty pie.
Serving Tip: To get those clean, professional slices, dip your knife in hot water and wipe it clean between every single cut. This prevents the meringue from sticking to the blade and dragging down into the filling.
Recipe FAQs
What are common lemon meringue pie mistakes?
Under boiling the filling or adding sugar too quickly to the whites. These errors cause a runny center or a weeping meringue. Ensure the filling hits a full boil and sugar is incorporated one tablespoon at a time.
Is cream of tartar or cornstarch better for meringue?
Cream of tartar is the superior choice. It stabilizes the egg white proteins more effectively, ensuring the peaks stay stiff and glossy during baking.
What is the perfect meringue secret?
Spread the meringue to the very edges of the crust. This seals the foam to the pie and prevents it from shrinking. If you enjoyed mastering the texture of this foam, you can apply similar precision to the creaminess of our eggplant dip.
What is the best meringue for lemon pie?
A French meringue beaten to stiff, glossy peaks. This provides the classic mahogany finish and the structural integrity needed for clean slices.
How to prevent the meringue from weeping?
Add sugar gradually and bake until peaks are mahogany. This ensures the sugar dissolves fully and the structure sets properly to avoid syrup layers.
Why is my lemon filling runny?
The cornstarch didn't reach a full boil. The filling must boil for one minute to allow the cornstarch to gelatinize and thicken the mixture.
Is it true that I should let the filling cool before adding meringue?
No, this is a common misconception. You must mound the meringue onto the hot filling to create a thermal bond that prevents the layers from separating.
Lemon Meringue Pie Recipe