Ina Garten Chocolate Brownie Pudding

- Time: Active 20 minutes, Passive 1 hours, Total 1 hours 20 minutes
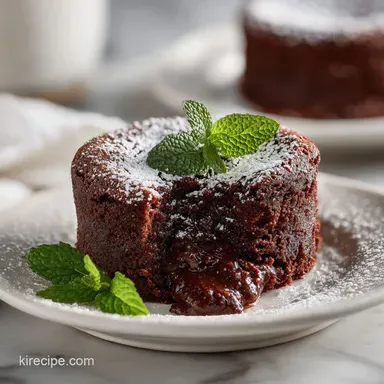
- Flavor/Texture Hook: A velvety, molten chocolate center topped with a thin, shattering sugar crust.
- Perfect for: Cozy dinner parties or a sophisticated alternative to standard birthday cakes.
- Mastering Ina Garten Chocolate Brownie Pudding
- Why the Science Works
- Component Analysis of the Batter
- Picking the Right Ingredients
- Gathering Your Baking Tools
- Step by Step Baking Guide
- Fixing Potential Baking Errors
- Variation and Substitution Ideas
- Storing and Enjoying Leftovers
- Styling Your Final Dish
- Myths About Brownie Pudding
- Recipe FAQs
- 📝 Recipe Card
Mastering Ina Garten Chocolate Brownie Pudding
The first time I pulled this dish out of the oven, I was convinced I'd messed it up. The center still had a slight, rhythmic wobble when I nudged the pan, and the top looked like a dry, parched lakebed of cracked chocolate. I almost reached for the flour to start over, but then I remembered the smell.
It wasn't the smell of burnt flour or overcooked eggs, it was the deep, heady aroma of blooming cocoa and melted butter that filled every corner of my kitchen.
I let it sit for a few minutes, grabbed a spoon, and broke through that top layer. The sound was a soft, distinct "snap" as the sugar crust shattered. Underneath, I found a texture that wasn't quite a cake but wasn't quite a pudding either. It was rich, dark, and utterly silky.
That single bite changed how I thought about chocolate desserts forever. It's the kind of recipe that rewards patience and precision rather than speed.
We often think of brownies as sturdy, portable snacks, but this version is meant to be eaten with a spoon while it's still warm enough to melt a scoop of vanilla ice cream. Since that first nervous bake, I've made this dozens of times, learning exactly when to pull it from the oven to keep that molten heart intact.
It's a foolproof crowd pleaser once you understand how the steam from the water bath protects the delicate proteins in the eggs.
Why the Science Works
- Thermal Buffering: The water bath limits the external temperature of the baking dish to 212°F (100°C), preventing the egg proteins from curdling or becoming rubbery.
- Sugar Recrystallization: High sugar content migrates to the surface during the initial bake, creating the signature thin, shattering crust through rapid dehydration.
- Maillard Enhancement: Instant espresso powder doesn't make the dish taste like coffee; instead, its acidity and bitterness intensify the fruity notes of the Dutch process cocoa.
- Starch Gelatinization: The low flour to fat ratio ensures the starch only provides enough structure to hold the cocoa in suspension without turning the dish into a dense sponge.
| Method | Time | Texture | Best For |
|---|---|---|---|
| Traditional Oven | 1 hours | Shattering crust, molten center | Elegant dinner parties |
| Stovetop (Double Boiler) | 45 minutes | Uniformly creamy, no crust | Quick cravings, casual eating |
| Oven (No Water Bath) | 40 minutes | Cake like, dry edges | When you want a standard brownie |
Choosing the right method depends entirely on your texture preference. While the stovetop version is faster and produces a consistent, mousse like consistency, you lose that magical contrast between the crispy top and the velvety interior. If you're looking for that classic experience, the oven with a water bath is non negotiable. This reminds me of the richness in my Chocolate Cream Cheese recipe.
Component Analysis of the Batter
| Ingredient | Science Role | Pro Secret |
|---|---|---|
| Extra Large Eggs | Emulsification and structure | Use room temperature eggs to ensure the fat and protein bond smoothly without breaking. |
| Dutch Process Cocoa | Flavor and pH balance | This cocoa is treated with alkali, making it darker and less acidic, which creates a smoother mouthfeel. |
| Unsalted Butter | Fat and moisture | Melt the butter and let it cool slightly; if it's too hot, it will scramble the eggs upon contact. |
Every ingredient in this list serves a specific structural purpose. When you whisk the eggs and sugar together, you're not just mixing them; you're creating a stable foam that traps air. This air expands in the heat of the oven, providing the only lift this dessert gets since there is no chemical leavening like baking powder. If you want something more layered and complex, try this Chocolate Peanut Butter recipe.
Picking the Right Ingredients
To make this recipe work, we need to be specific about our pantry choices. This isn't the place for substitutions that lower the fat content; the luxury of this pudding comes from the high-quality fats and the specific type of chocolate used.
- 0.5 lb unsalted butter: Melted and slightly cooled. Why this? Provides the fat base for the velvety texture.
- 4 extra large eggs: At room temperature. Why this? They provide the lift and structure for the pudding.
- 2 cups granulated sugar: Standard white sugar. Why this? Essential for creating the crackly crust on top.
- 0.75 cup Dutch process cocoa powder: Sifted. Why this? Offers a deeper, smoother chocolate flavor than natural cocoa.
- 0.5 cup all purpose flour: Measured by weight if possible. Why this? Just enough to bind the ingredients together.
- 1 tablespoon Framboise liqueur: Or raspberry liqueur. Why this? Brightens the heavy chocolate with a hidden fruity note.
- 1 tablespoon pure vanilla extract: high-quality. Why this? Acts as a flavor enhancer for the cocoa.
- 0.25 teaspoon kosher salt: Fine grain. Why this? Balances the intense sweetness of the sugar.
- 1 teaspoon instant espresso powder: Fine powder. Why this? Deepens the chocolate flavor without adding coffee taste.
| Original Ingredient | Substitute | Why It Works |
|---|---|---|
| Framboise Liqueur | Strong brewed coffee | Adds depth without fruitiness. Note: Does not provide the same aromatic lift. |
| Dutch Process Cocoa | Natural Cocoa + 1/8 tsp baking soda | Mimics the pH of Dutch cocoa. Note: Flavor will be slightly more acidic. |
| Extra Large Eggs | 5 Large Eggs | Maintains the correct protein and fat ratio for the set. |
Gathering Your Baking Tools
You don't need a kitchen full of gadgets, but a few specific items make the water bath process much safer and more effective. I've learned the hard way that trying to balance a shallow pan filled with boiling water is a recipe for a trip to the emergency room.
First, you'll need a rectangular baking dish, roughly 8x12x2 inches. It needs to be deep enough to hold the pudding but shallow enough for the top to crust over. Next, you need a larger roasting pan that the baking dish can fit inside comfortably with at least an inch of space on all sides.
This allows the water to circulate freely.
A stand mixer or a sturdy hand mixer is vital here. You'll be beating the eggs and sugar for several minutes until they are thick and pale. Doing this by hand is possible, but your arm will certainly feel it the next day. Finally,, a fine mesh sieve is a must for the cocoa powder.
Cocoa is notoriously clumpy, and finding a dry pocket of bitter powder in your silky pudding is quite unpleasant.
step-by-step Baking Guide

- Prep the environment. Preheat your oven to 325°F (160°C) and place a damp kitchen towel in the bottom of a large roasting pan to prevent the baking dish from sliding.
- Melt the butter. Slowly melt 0.5 lb unsalted butter in a small saucepan, then set it aside to cool for 5 minutes so it doesn't cook the eggs.
- Whip the foundation. Beat 4 extra large eggs and 2 cups granulated sugar on medium high speed for about 5 to 10 minutes until the mixture is thick and pale yellow.
- Incorporate aromatics. Lower the mixer speed and pour in 1 tablespoon Framboise, 1 tablespoon vanilla extract, and the cooled butter.
- Sift the drys. Combine 0.75 cup Dutch process cocoa, 0.5 cup all purpose flour, 1 teaspoon instant espresso powder, and 0.25 teaspoon kosher salt. Note: Sifting ensures no bitter clumps remain.
- Combine gently. Fold the dry ingredients into the wet mixture using a rubber spatula until no white streaks of flour remain.
- Transfer the batter. Pour the glossy mixture into your 8x12x2 inch baking dish and smooth the top.
- Set the bath. Place the baking dish into the roasting pan and carefully pour hot tap water into the roasting pan until it reaches halfway up the sides of the dish.
- Bake with precision. Bake for 1 hours. The top should be firm and crackled, but the center will still have a slight jiggle.
- Cool and set. Remove the dish from the water bath and let it rest on a wire rack for at least 15 minutes before serving to allow the center to firm up.
Fixing Potential Baking Errors
Why the Pudding is Greasy
If you notice a layer of yellow oil pooling on top or around the edges, the emulsion has likely broken. This usually happens if the melted butter was added while it was still piping hot, effectively "melting" the egg structure before it could set.
It can also happen if the eggs were straight from the fridge; the cold eggs cause the butter to seize into tiny clumps rather than integrating.
The Center is Completely Liquid
Don't panic if the center seems too soft immediately after the timer goes off. This dish relies on carryover cooking. However, if it's truly liquid after 1 hours, your oven temperature might be running low. Using an oven thermometer is the only way to be sure.
Also, check your water bath level; if the water was cold when it went in, it takes longer for the pudding to start cooking.
| Problem | Root Cause | Solution |
|---|---|---|
| Rubbery texture | Overbeating after adding flour | Only fold flour in until just combined; stop as soon as streaks disappear. |
| No crackly top | Not enough air whipped into eggs | Ensure you beat eggs and sugar for the full 5-10 minutes until pale. |
| Grainy mouthfeel | Sugar didn't dissolve | Beat eggs and sugar longer or use finer granulated sugar. |
Common Mistakes Checklist
- ✓ Always use room temperature eggs to maintain a stable emulsion.
- ✓ Never skip the sifting step for the cocoa powder to avoid bitter lumps.
- ✓ Use hot water (not boiling) for the water bath to jumpstart the cooking.
- ✓ Avoid opening the oven door frequently, which drops the temperature and disturbs the set.
- ✓ Let the pudding rest for 15 minutes before serving; the texture improves as it cools.
Variation and Substitution Ideas
Scaling this recipe down is relatively simple if you're cooking for a smaller group. To make a half batch, use 1 stick of butter, 2 extra large eggs, 1 cup of sugar, and roughly 6 tablespoons of cocoa.
You'll need to reduce the baking time by about 10 to 15 minutes and use a smaller baking dish, such as an 8x8 inch square. The water bath rules remain the same: halfway up the sides.
If you are scaling up for a large party, I recommend making two separate batches in two dishes rather than doubling everything into one giant pan. Doubling the volume in a single dish significantly changes the heat distribution, often leading to burnt edges and a raw, cold center.
For a gluten-free version, you can swap the 0.5 cup of all purpose flour for a 1:1 gluten-free baking blend. Because the flour content is so low to begin with, the texture remains remarkably similar.
Avoid using nut flours like almond meal here, as the high oil content in the nuts can cause the pudding to become overly greasy and prevent the top from forming that iconic crust.
Storing and Enjoying Leftovers
This pudding is actually quite resilient. You can store leftovers in the refrigerator for up to 4 days, though the top crust will lose its initial "shatter" and become more of a soft fudge layer.
To reheat, I suggest using the oven at 300°F (150°C) for about 10 minutes to help crisp the top back up. The microwave works in a pinch (30 seconds), but it will turn the whole thing into a uniform, soft texture.
For freezing, scoop individual portions into airtight containers. It will keep for up to 2 months. Thaw it in the fridge overnight before reheating. As for zero waste, if you have small scraps left over, they make an incredible base for a chocolate trifle.
Layer the brownie pudding bits with whipped cream and fresh raspberries for a completely new dessert the next day.
Styling Your Final Dish
Presentation is where you can really lean into the rustic elegance of this dish. Because it's served from the pan, the dish itself matters. A clean, white ceramic baker or a classic glass Pyrex dish allows the dark chocolate to pop.
I like to dust the top with a tiny bit of extra cocoa powder or a very light sprinkle of Maldon sea salt right before it hits the table. The salt cuts through the richness and makes the chocolate feel even more intense.
When serving, don't try to cut clean squares. This is a spoonable dessert. Embrace the mess. A large, shallow bowl is better than a flat plate, as it catches any of the molten center that tries to escape. A dollop of unsweetened whipped cream or a scoop of high-quality vanilla bean ice cream is the classic pairing.
The cold cream hitting the warm chocolate creates a sensory experience that's hard to beat.
If you want to get fancy, a few fresh raspberries or a drizzle of raspberry coulis ties back to the Framboise liqueur hidden inside the batter. It adds a pop of color and a necessary hit of acid to balance the heavy fats. Just remember, the star is that crackly, dark top don't hide it under too many toppings!
Myths About Brownie Pudding
One common myth is that you must sift the flour. While sifting cocoa is mandatory because of its tendency to clump, modern all purpose flour is usually fine enough to whisk in without sifting. Another misconception is that you can't use "natural" cocoa powder.
You can, but the result will be much lighter in color and have a sharper, more acidic bite that might clash with the espresso. Stick to Dutch process for that "Ina" look.
Finally, some people think the water bath is optional. It really isn't. Without the water bath, the edges of the pudding will bake much faster than the center, leaving you with a ring of overcooked, dry cake and a middle that never quite sets.
The steam created by the bath also helps develop that thin, delicate crust on top by keeping the oven environment humid enough to prevent the surface from drying out too quickly and becoming tough.

Recipe FAQs
What makes Ina Garten's brownie pudding special?
The texture contrast. It creates a thin, shattering sugar crust over an incredibly fudgy, molten center that is halfway between a dense brownie and a silky custard.
Is Ina Garten brownie pudding sweetened or unsweetened cocoa powder?
Dutch process cocoa powder is recommended. This type is treated with alkali, resulting in a darker color and a smoother, less acidic chocolate flavor ideal for this rich dessert.
What is Ina Garten's favorite dessert from Trader Joe's?
This information is not detailed in the recipe notes. Her recipes generally focus on high-quality ingredients sourced from specialty markets, rather than specific pre-made grocery items.
What size pan to use for Ina Garten brownie pudding?
Use a 9x13 inch (or similar 8x12 inch) rectangular baking dish. This size allows the pudding to bake evenly without getting too thick, which is crucial for achieving the proper molten interior.
How to prevent the brownie pudding from developing rubbery edges?
Bake the dish in a water bath (bain marie). This buffers the temperature, ensuring the exterior proteins don't overcook while the center sets. If you enjoyed mastering the gentle cooking principle here, see how the same approach works in our Strawberry Tres Leches recipe.
Can I make this recipe ahead of time?
Yes, the batter can be made ahead. Prepare the batter up to 4 hours in advance, keeping it covered at room temperature before placing it into the water bath for baking.
How to achieve the signature thin, crackly top layer?
Ensure you beat the eggs and sugar for a full 5 to 10 minutes until pale and thick. This process incorporates enough air to create a stable foam structure that rises slightly and crystallizes into a crisp crust during baking.
Ina Garten Brownie Pudding
Ingredients:
Instructions:
Nutrition Facts:
| Calories | 497 kcal |
|---|---|
| Protein | 6g |
| Fat | 27g |
| Carbs | 63g |
| Fiber | 3g |
| Sugar | 51g |
| Sodium | 95mg |
